Premiere Tips -初級編- ワークスペースの色を調整する方法
概要
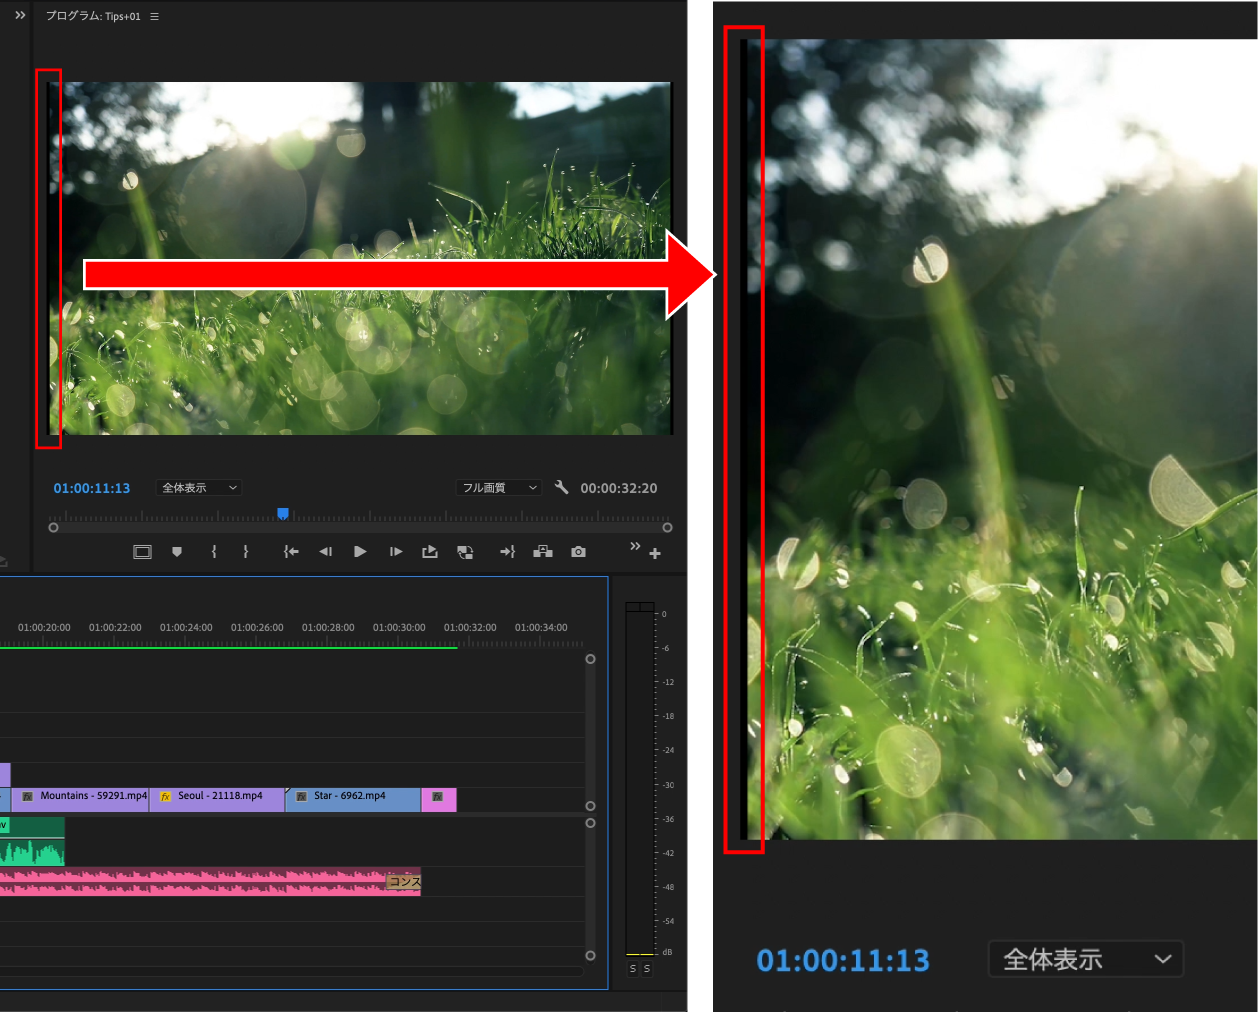
図のようにワークスペースが暗いとフレームサイズにクリップが合っていないことに気付かない場合があります。
今回はワークスペースを調整し見やすくする方法を詳しくご紹介します。
動画解説
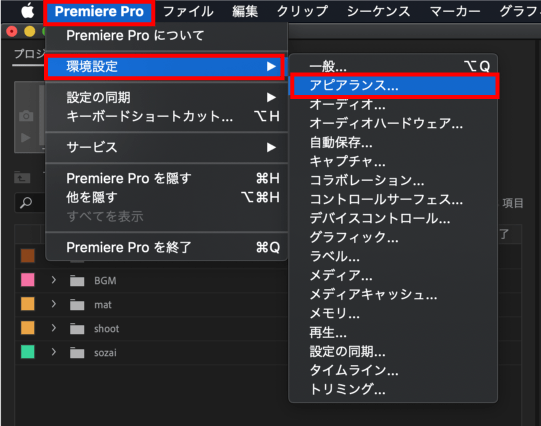
STEP01
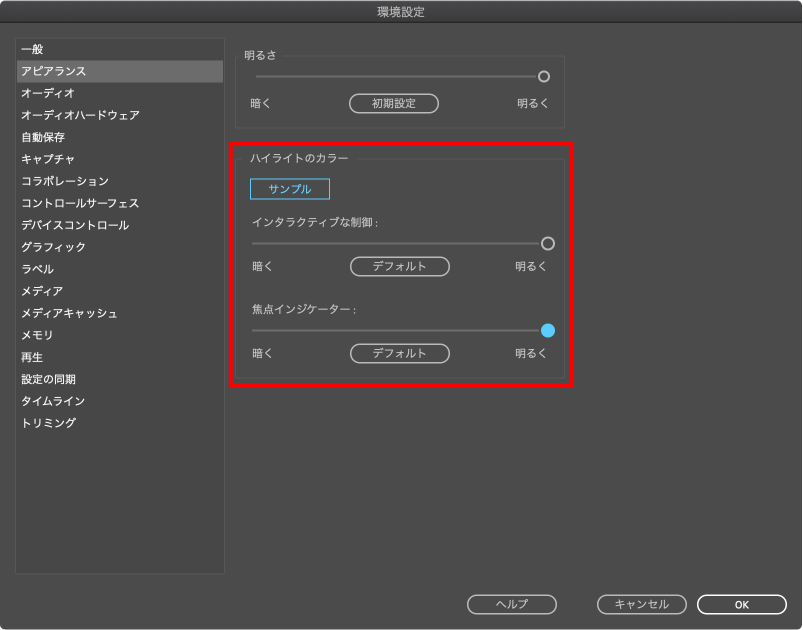
メニューバーにある【Premiere Pro】をクリックし、【環境設定】から【アピアランス】をクリックします。
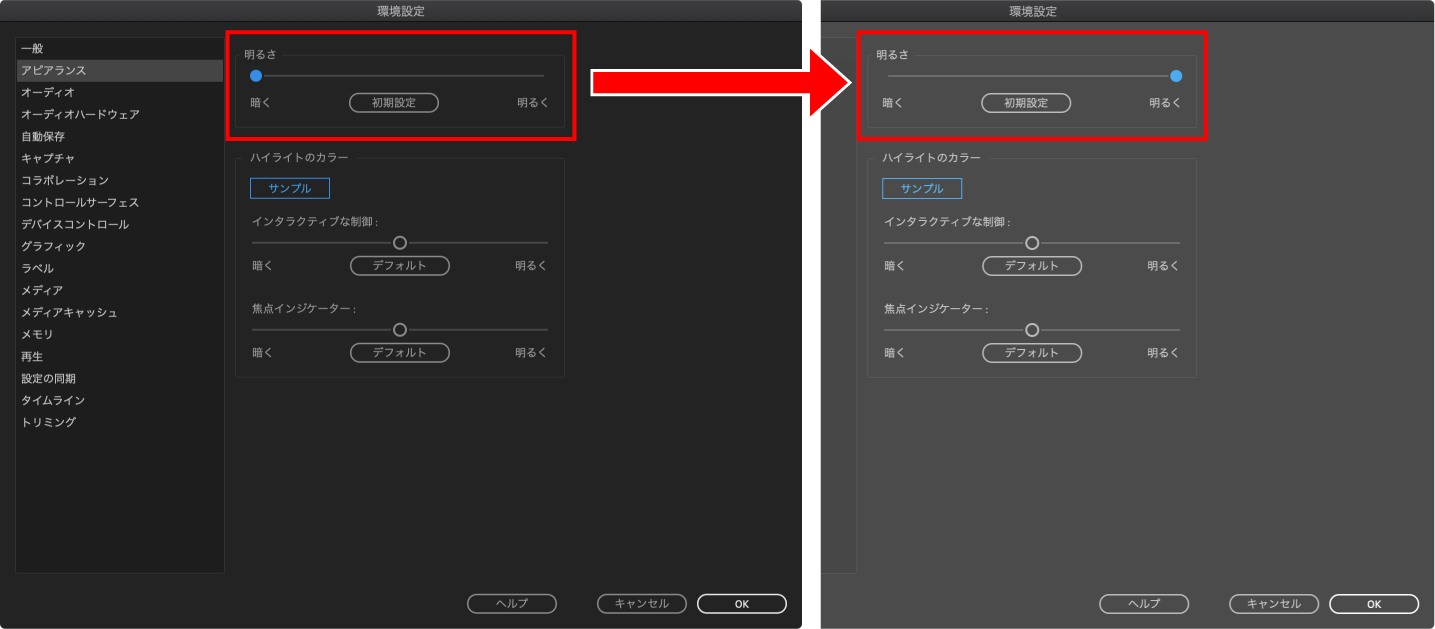
STEP02
環境設定ダイアログボックスが表示されるので、明るさにある【暗く】を【明るく】に移動して【OK】をクリックします。
ワークスペースを明るくしたことで、フレームサイズにクリップが合っていないのがわかりやすくなりました。

おまけTips
アピアランスでは、他にも選択時のハイライトのカラーも変更できます。
information
検証日:2021-05-06
環境:macOS Mojave(10.14.6) / Premiere Pro 2020(14.6)