After Effects Tips 看板を差し替える方法
概要
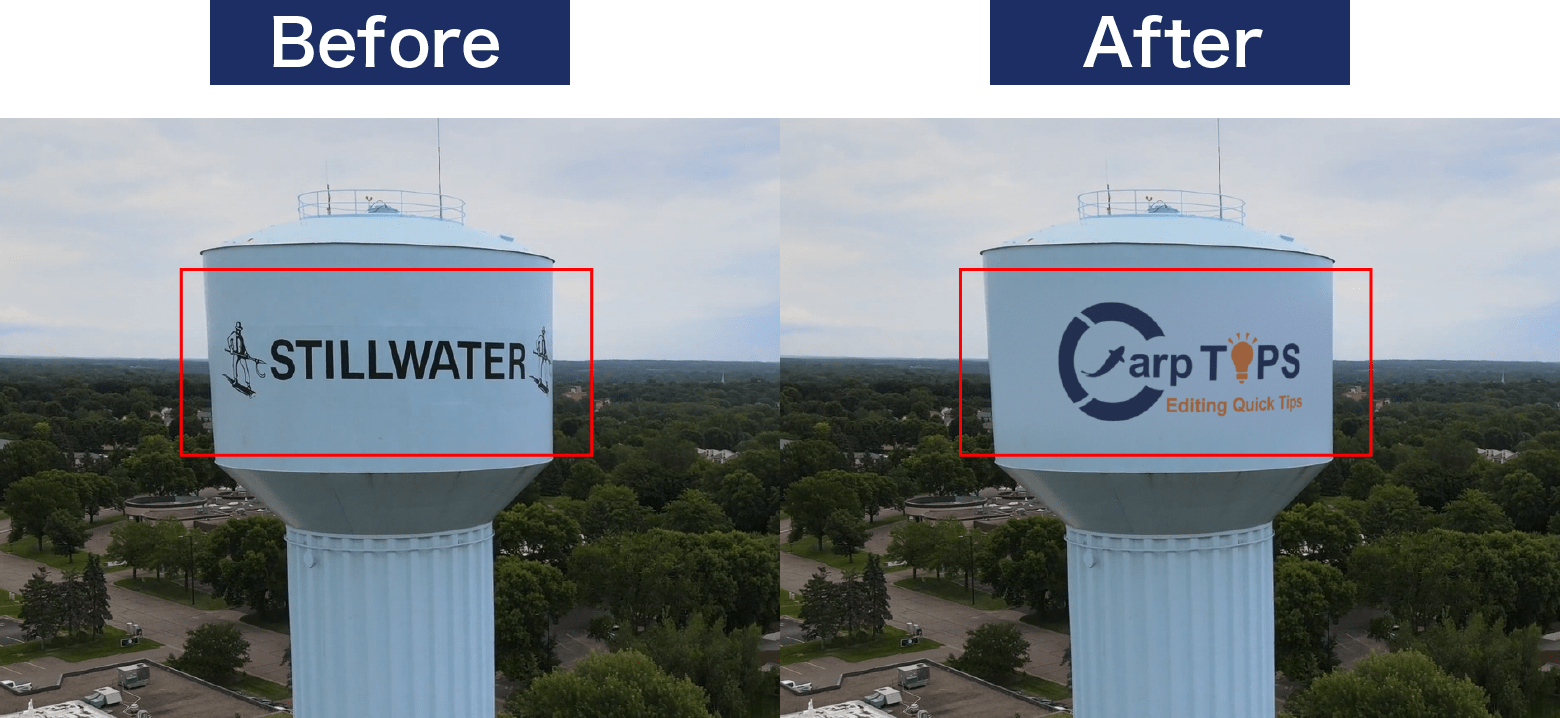
After Effectsで看板の文字を消してロゴに差し替える方法をご紹介します。
動画解説
トラッキング
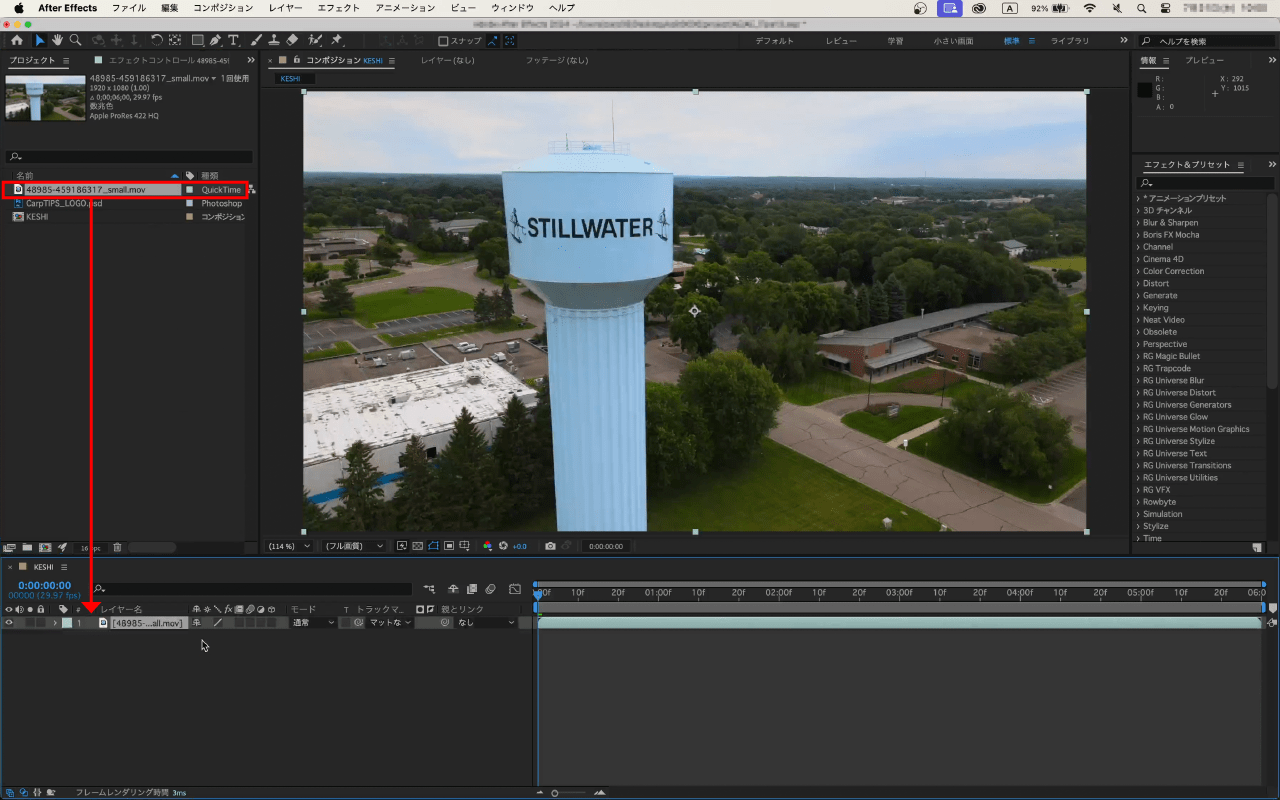
最初に看板の文字を消していきます。
フッテージをシーケンスに載せます。
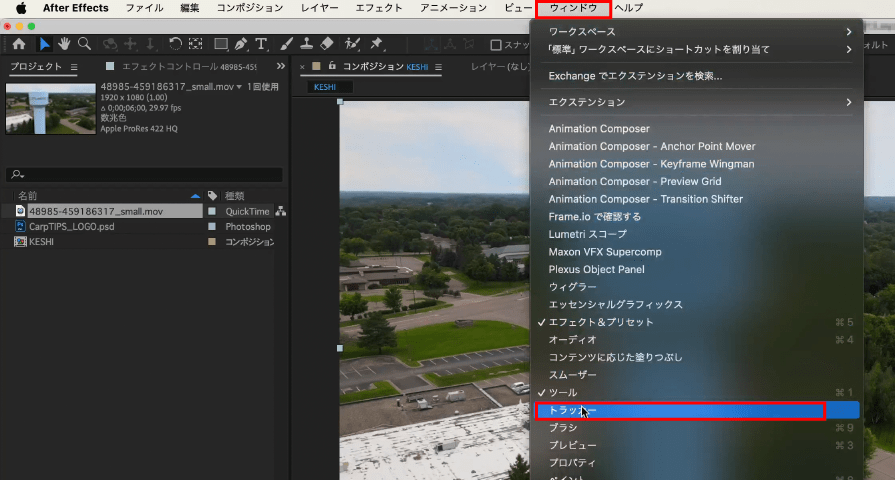
メニューバーにある【ウィンドウ】をクリックし、【トラッカー】をクリックします。
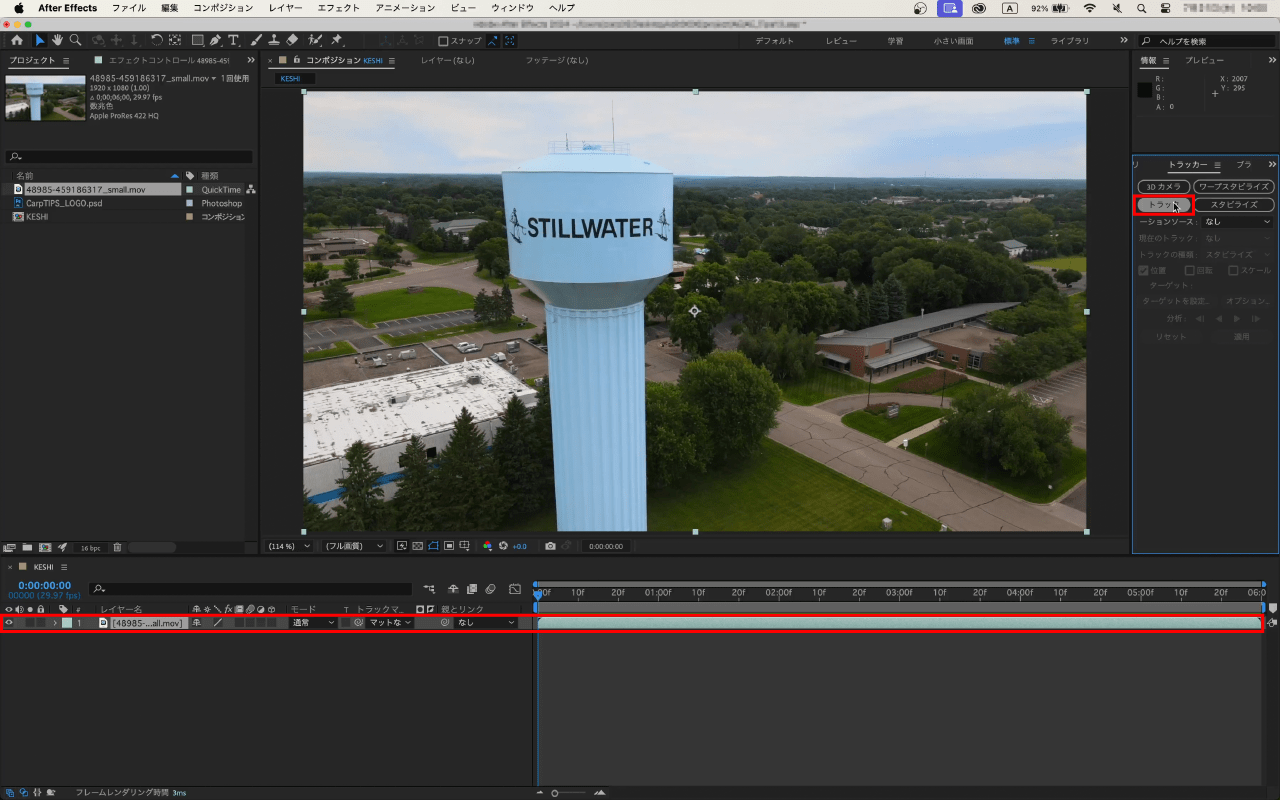
トラッカーパネルが表示されるので、フッテージを選択した状態で【トラック】をクリックします。

レイヤーパネルが表示されて【トラックポイント 1】がパネル内に表示されます。
次に映像を再生して、位置・回転・スケールに変化があるか確認し、欲しい情報のチェックボックスにチェックを入れます。
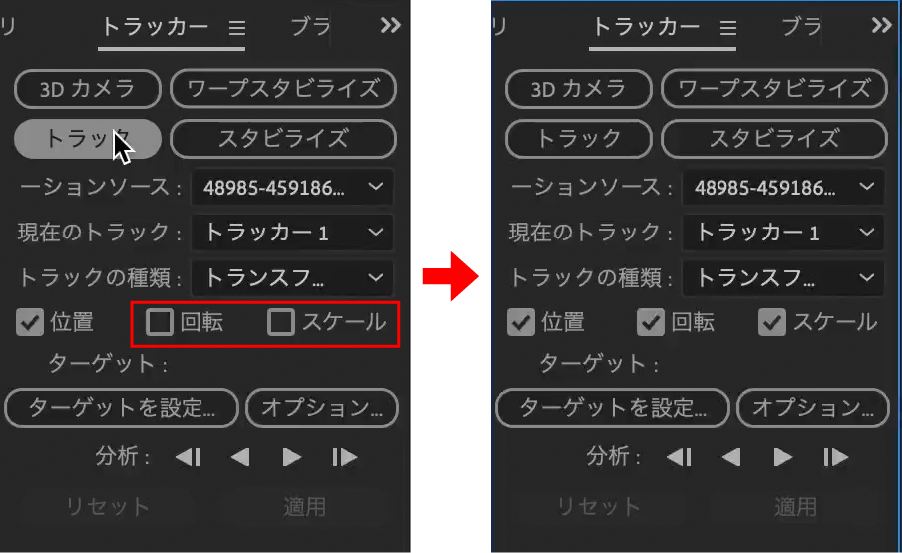
今回はパースが変化しているので、位置・回転・スケールのすべてにチェックを入れます。
チェックを入れた数が多いほど分析に時間がかかりますが、詳細な情報を得られます。
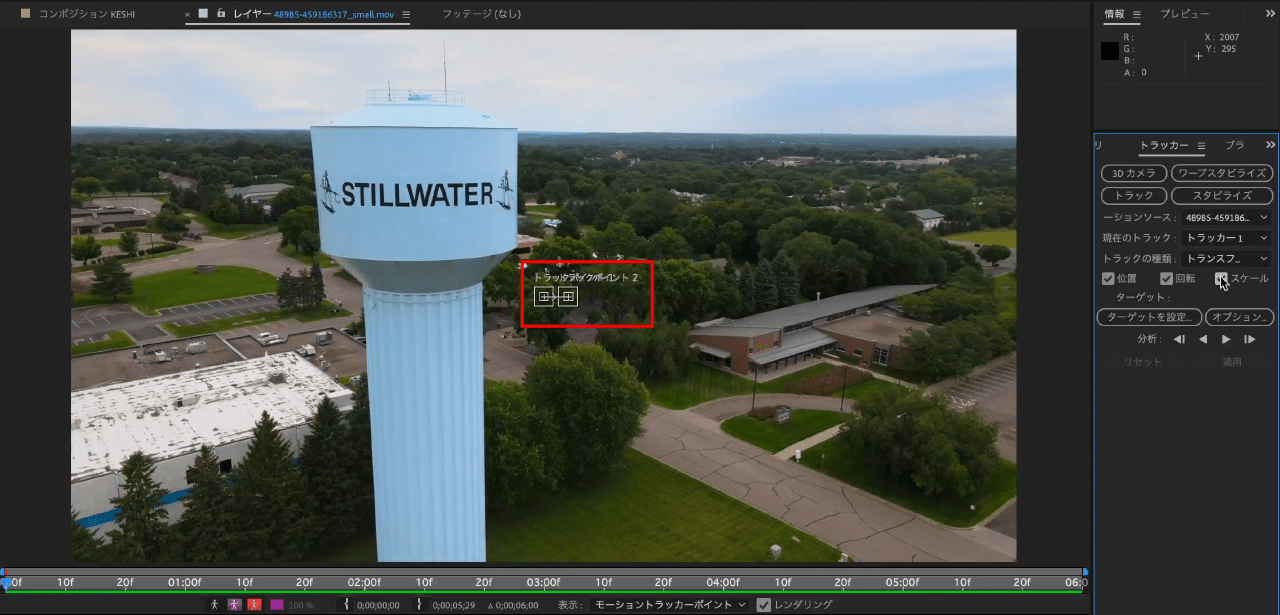
2個以上にチェックを入れると2点のトラックポイントが表示されます。
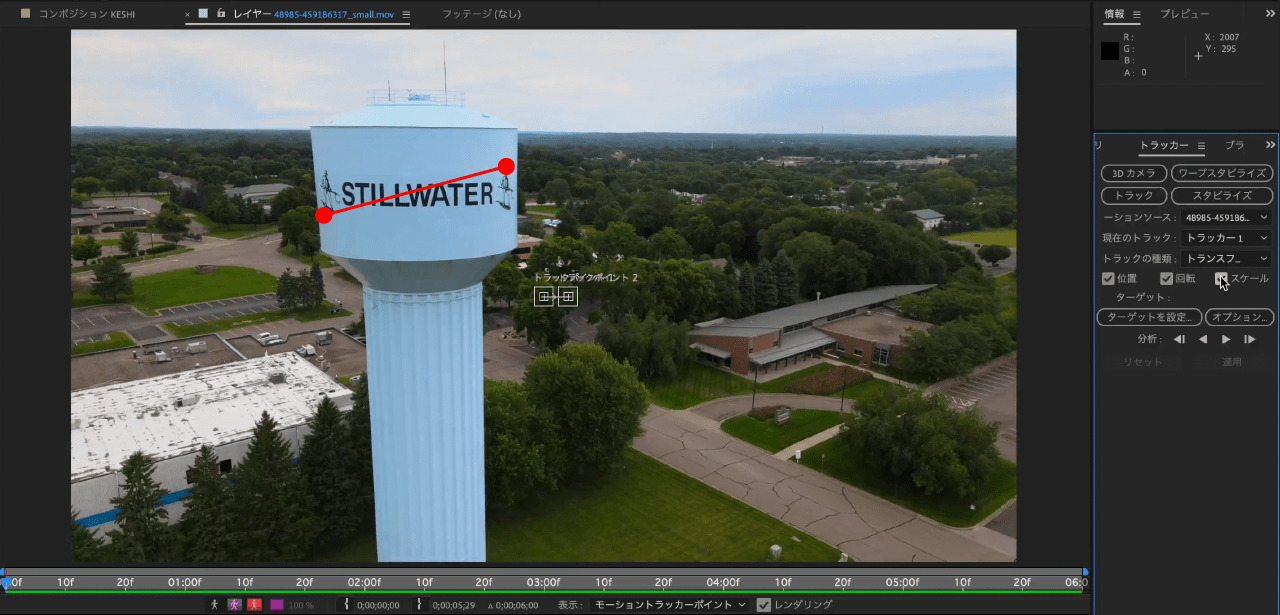
2点の場合、消したい対象物の対角線でトラックポイントを指定します。
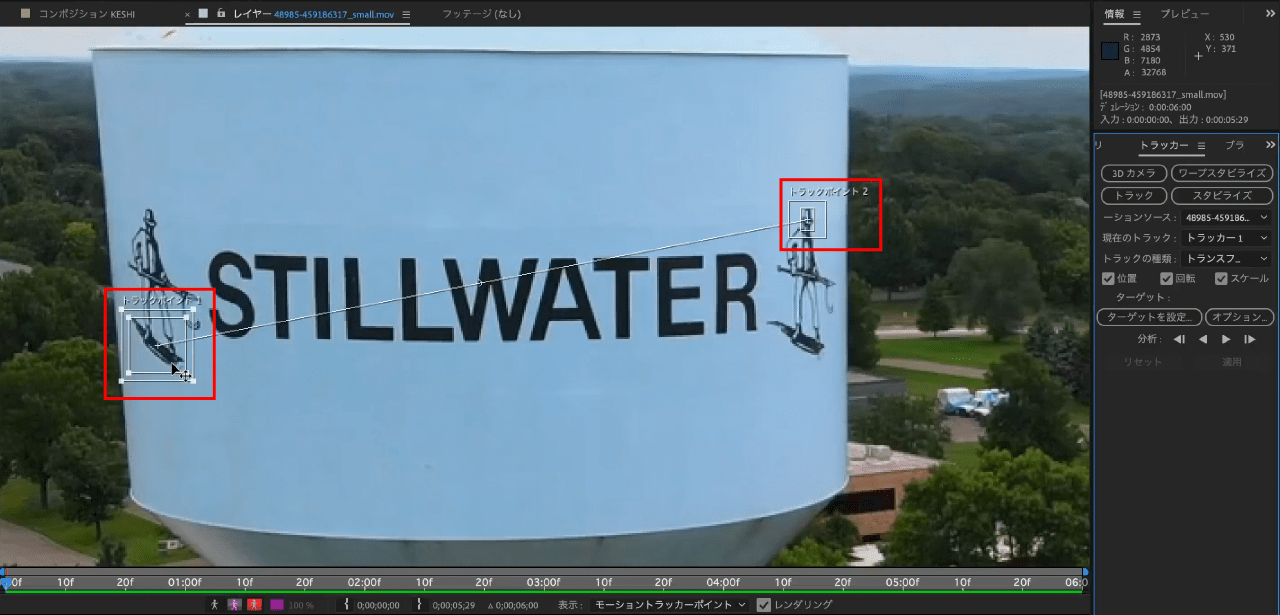
対象点を囲ってターゲット領域と検索領域を指定します。
ターゲット領域と検索領域については以下のTipsで解説しているので詳しくはこちらをご覧ください。
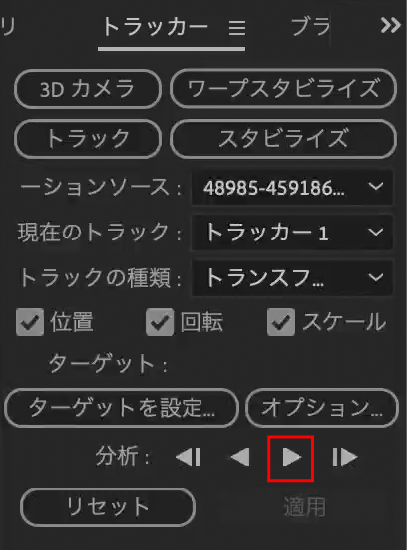
領域指定の調整が完了すれば【分析】の【再生方向に分析】をクリックすると、自動でフレーム間の分析が行われます。
分析が終わると全体を見直してターゲット領域がズレていないか確認をします。
ズレていればトラックポイント・領域範囲を調整して分析しなおします。
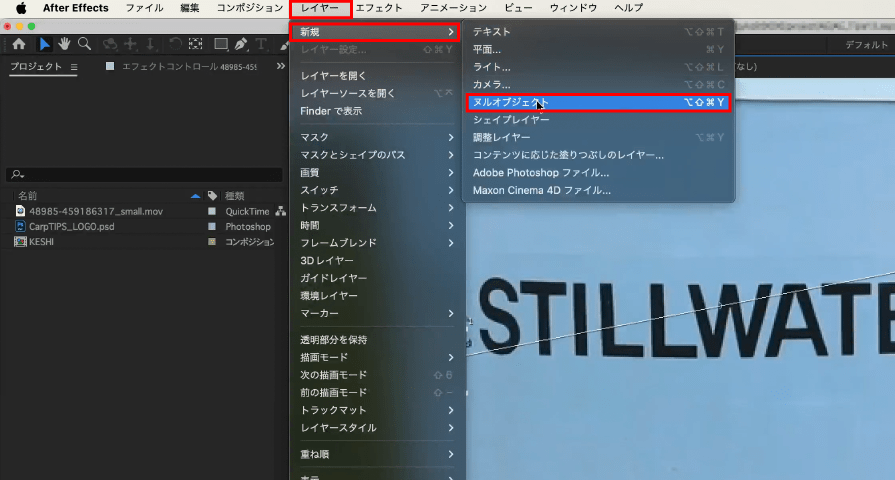
ターゲットを設定するために【ヌルオブジェクト】を使用します。
メニューバーにある【レイヤー】をクリックし、【新規】から【ヌルオブジェクト】をクリックします。
ショートカットキーoption ⌥+shift ⇧+command ⌘+Yでも作成することができます。
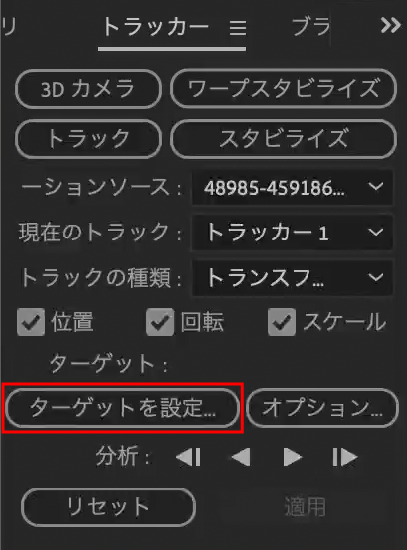
【ターゲットを設定】をクリックします。

ターゲットダイアログボックスが表示されるので、レイヤーの適用先がヌルオブジェクトであることを確認して【OK】をクリックします。
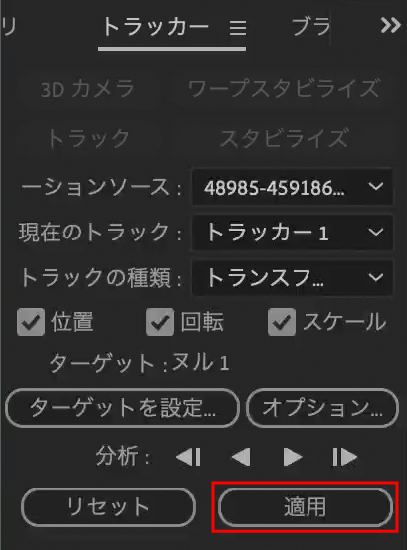
【適用】をクリックします。
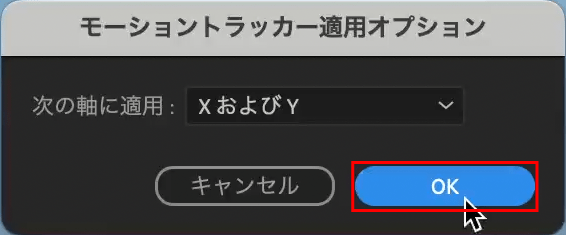
モーショントラッカー適用オプションダイアログボックスが表示されるので【OK】をクリックします。

0fにインジケーターを移動しておきます。
看板の文字消し
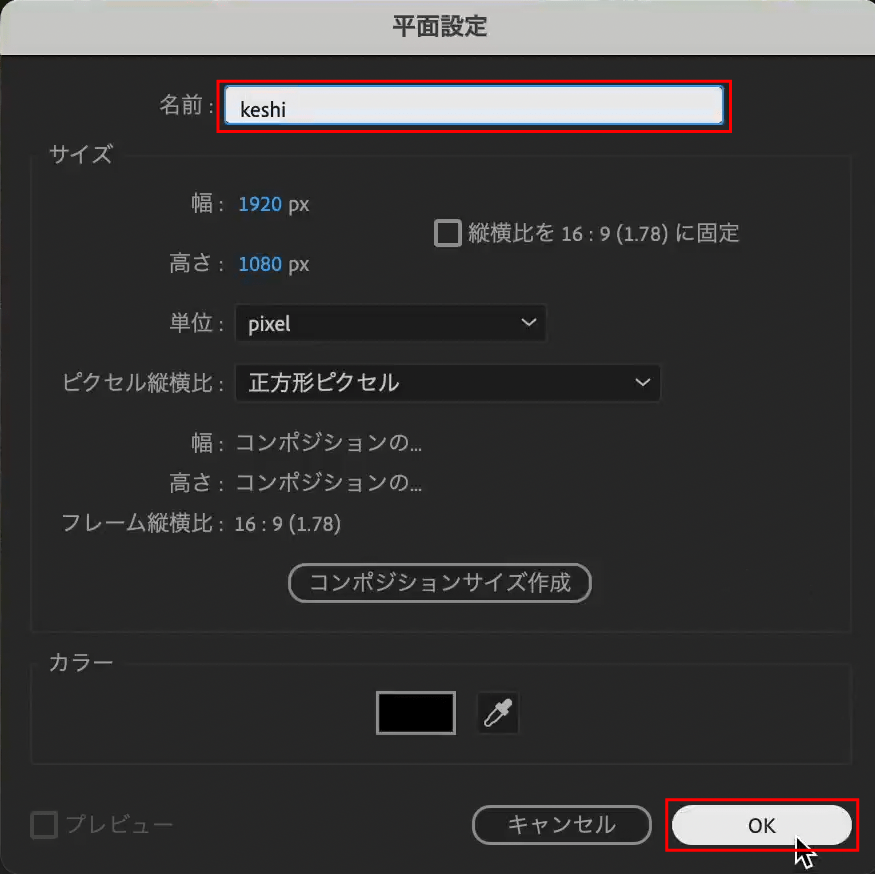
ショートカットキーcommand ⌘+Yで新規平面を作成して任意の名称に変更し、【OK】をクリックします。
今回は【keshi】としています。
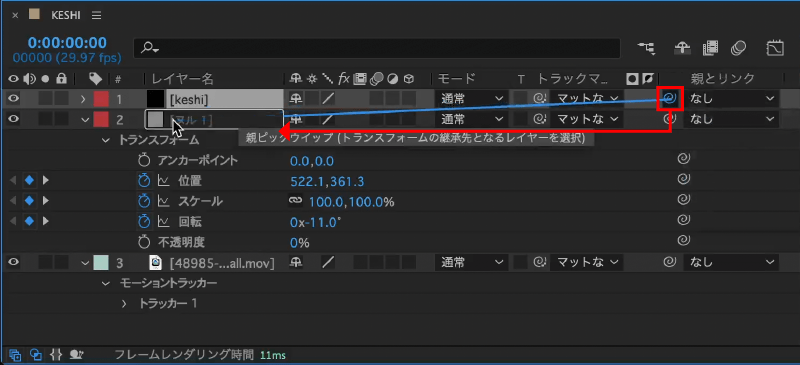
【keshi】の【親ピックウイップ】を【ヌル 1】に繋げます。


一旦【keshi】を非表示にします。
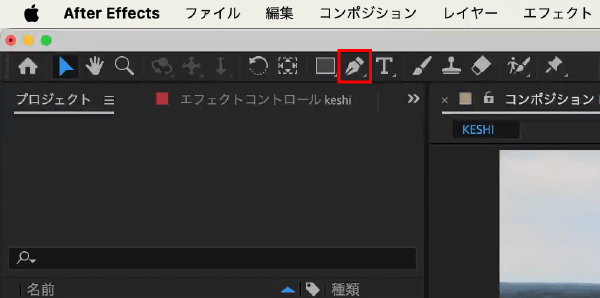
ツールにある【ペンツール】をクリックします。
ショートカットキーGでも選択ができます。


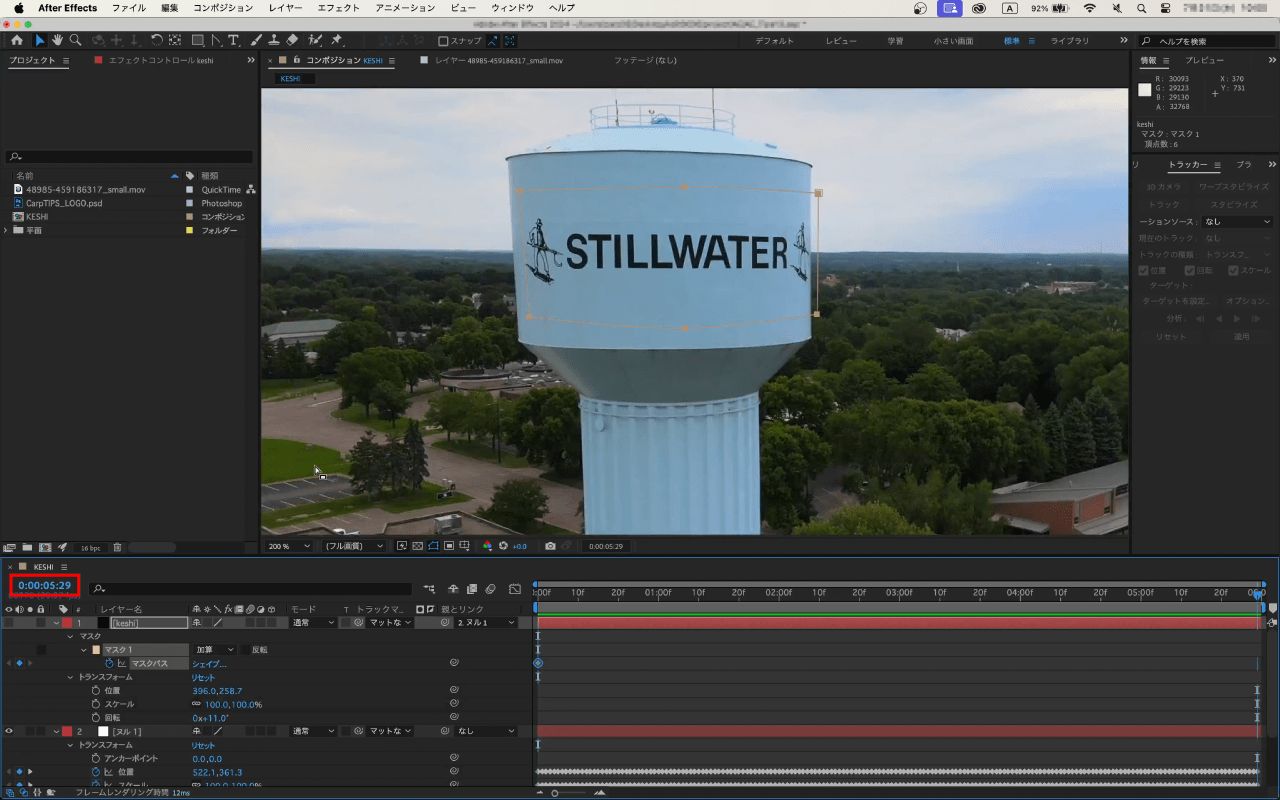
【keshi】を選択した状態でマスクを描きます。
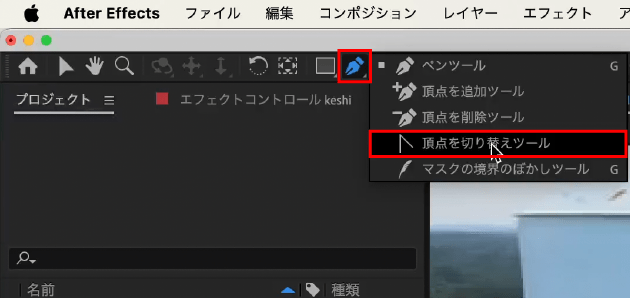
曲線にする場合は【ペンツール】を長押しして【頂点を切り替えツール】をクリックします。
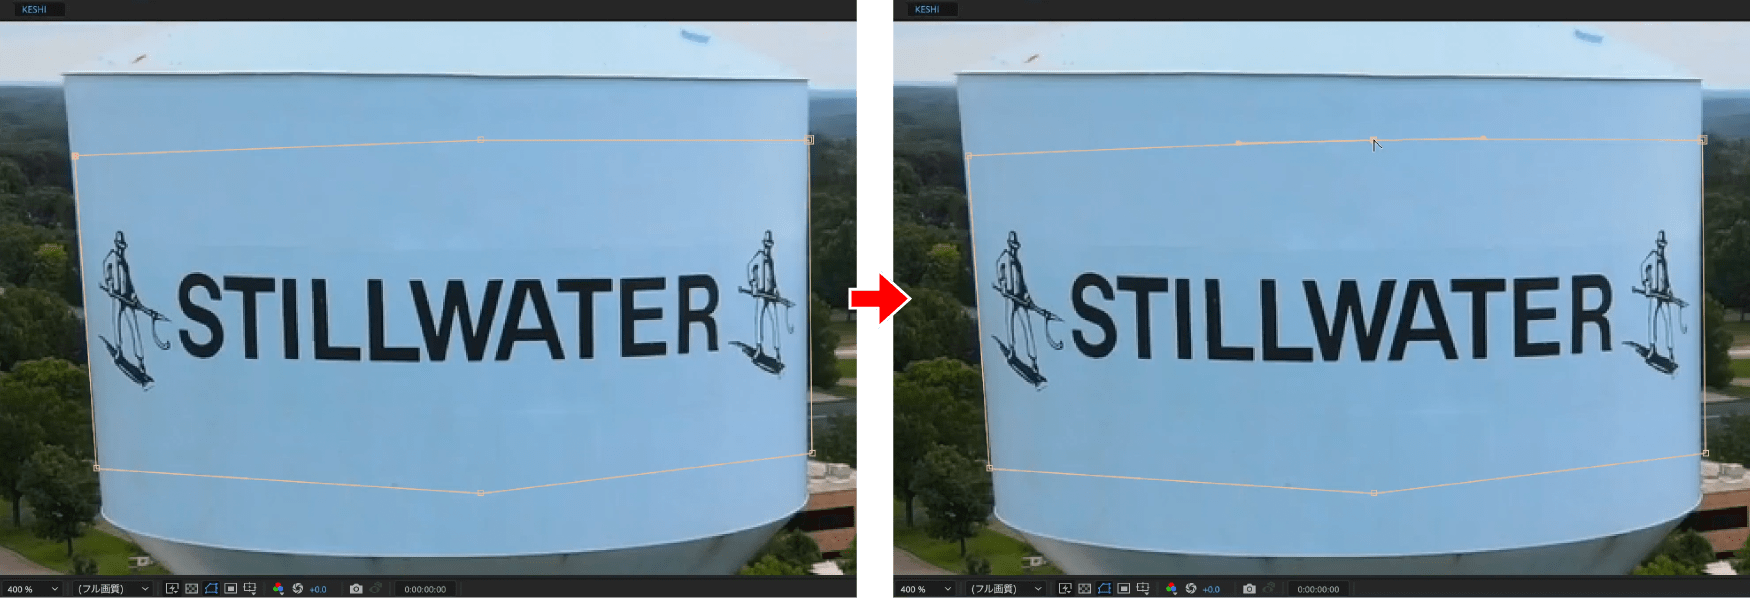
該当する頂点を選択することで曲線ができます。

変更されたプロパティを表示し、【マスクパス】のストップウォッチをクリックします。
ショートカットキーOで終点のフレームに移動します。
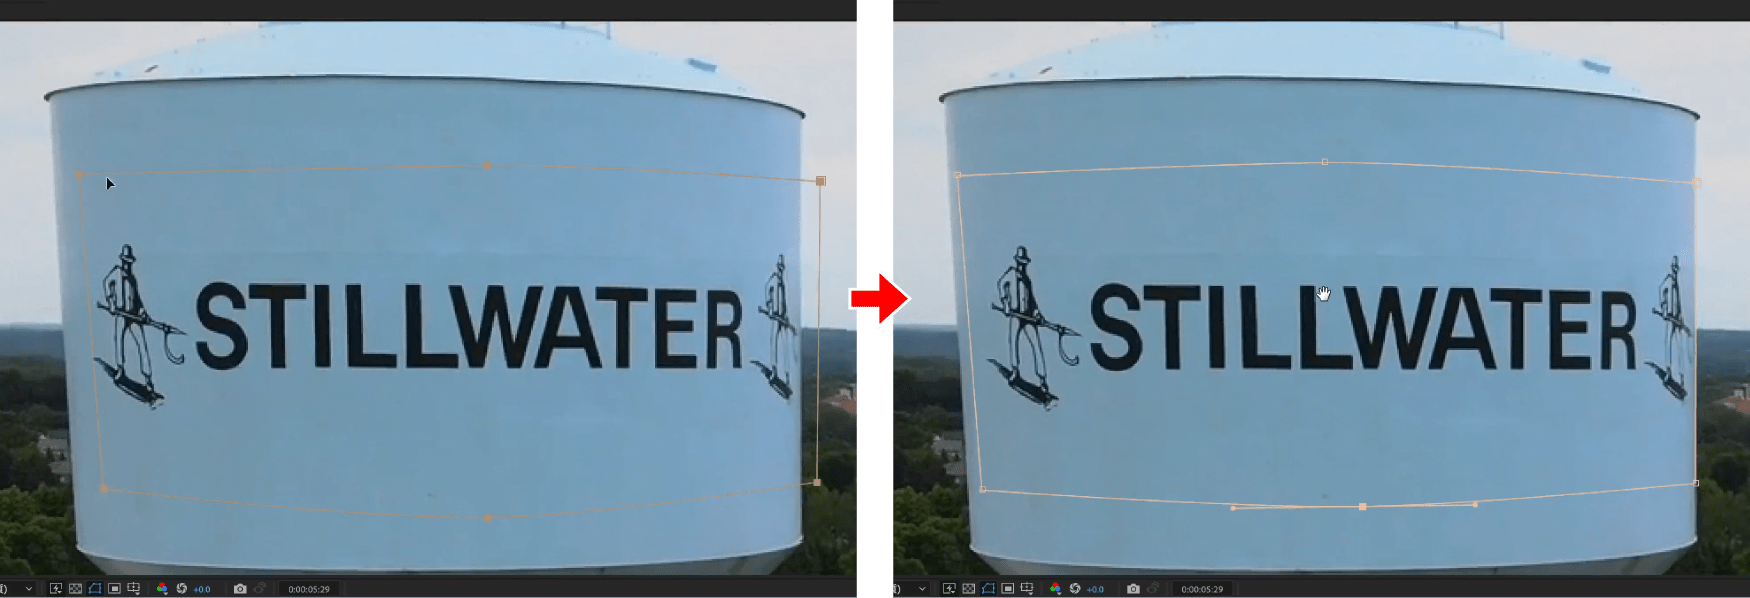
終点のフレームに合わせてマスクパスの調整を行います。
これで始点と終点のフレームにパスアニメーションができましたが、インジケーターを手動で動かして確認するとマスクパスがズレている箇所があるので調整します。

調整ができたら【マスク 1】を閉じて再び開きます。
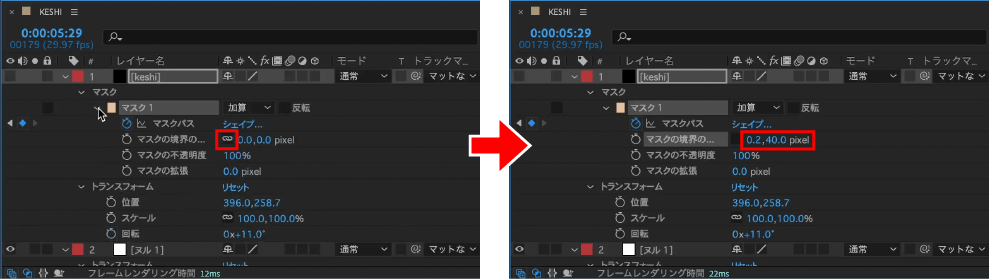
【マスクの境界のぼかし】の【現在の縦横比を固定】をクリックしてXの値を【0.2】、Yの値を【40】に変更します。
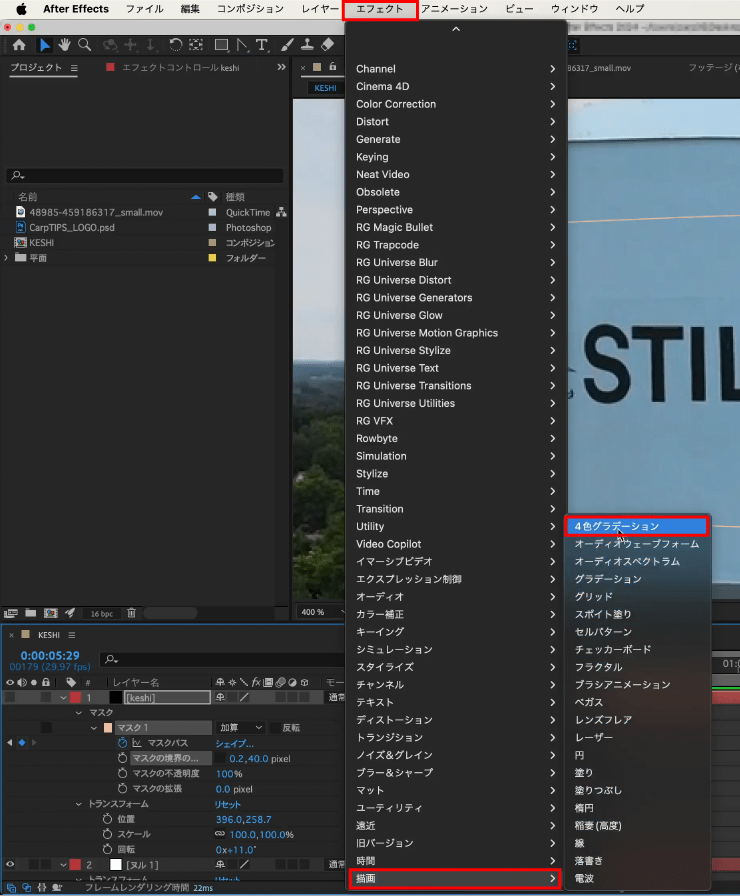
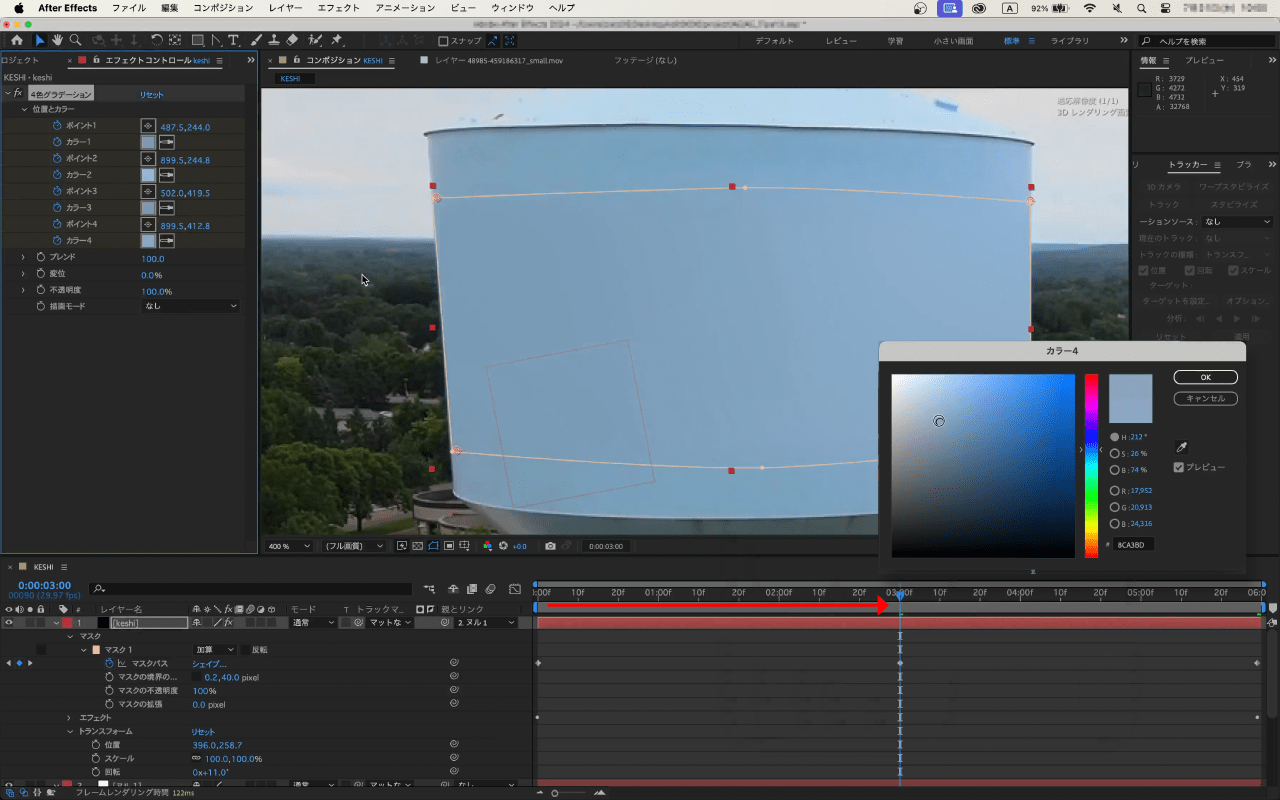
メニューバーにある【エフェクト】をクリックし、【描画】から【4色グラデーション】をクリックします。
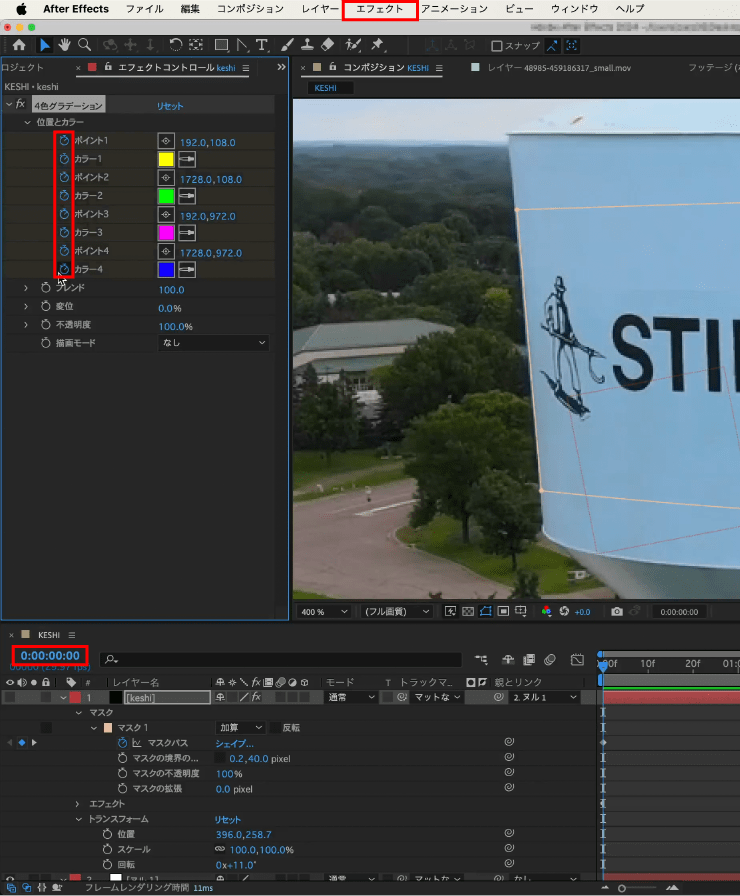
ショートカットキーIで0fにインジケーターを移動して、すべてのポイントとカラーのストップウォッチをクリックします。
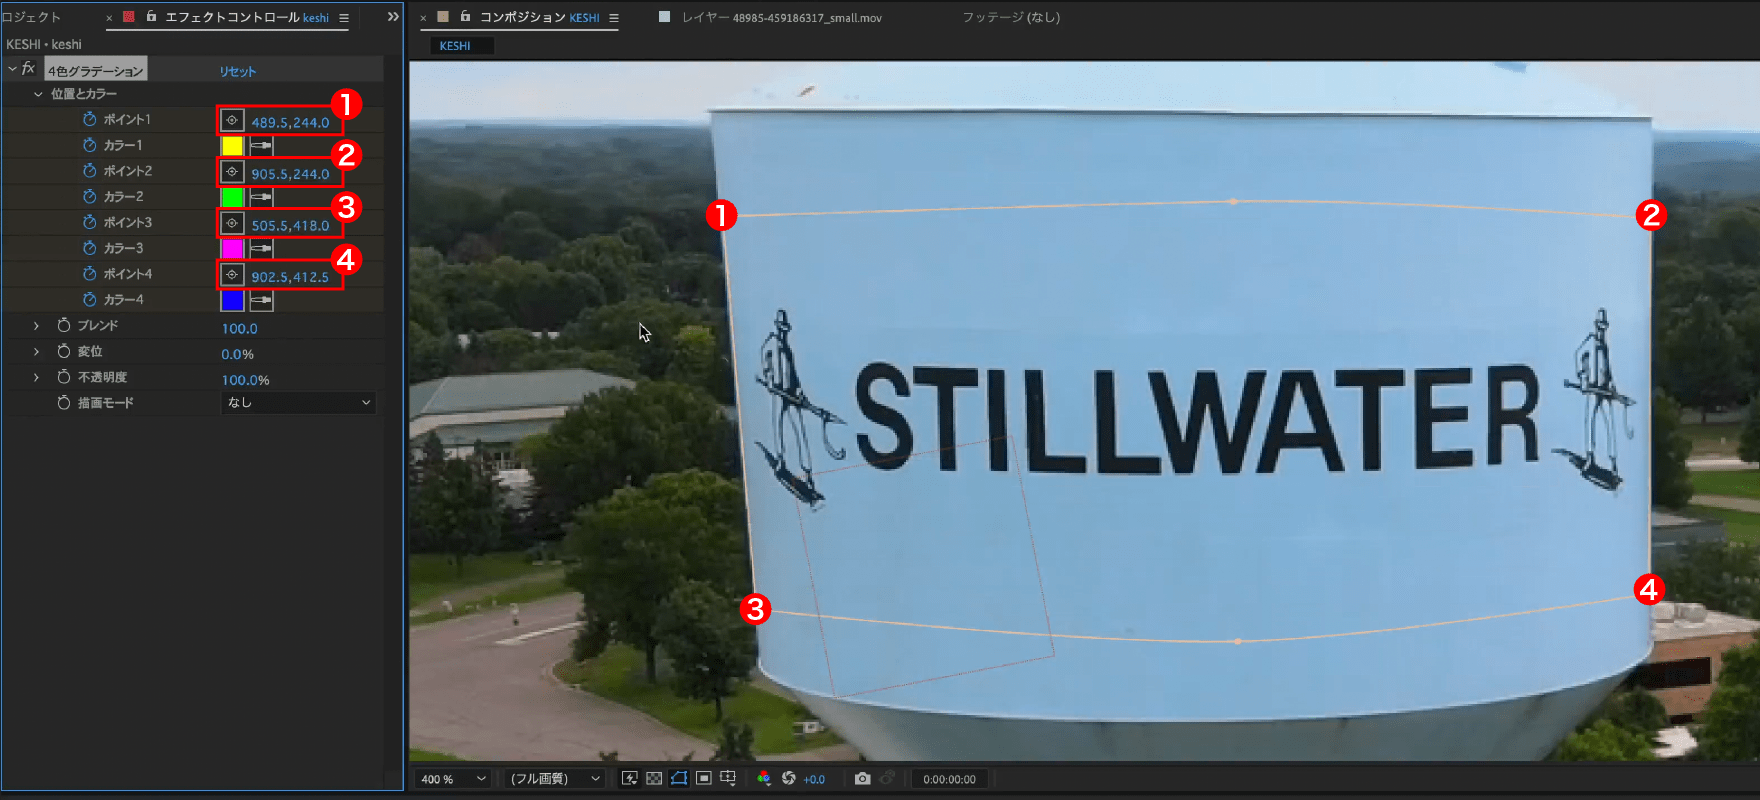
ポイントはマスクパスの四隅に移動させます。
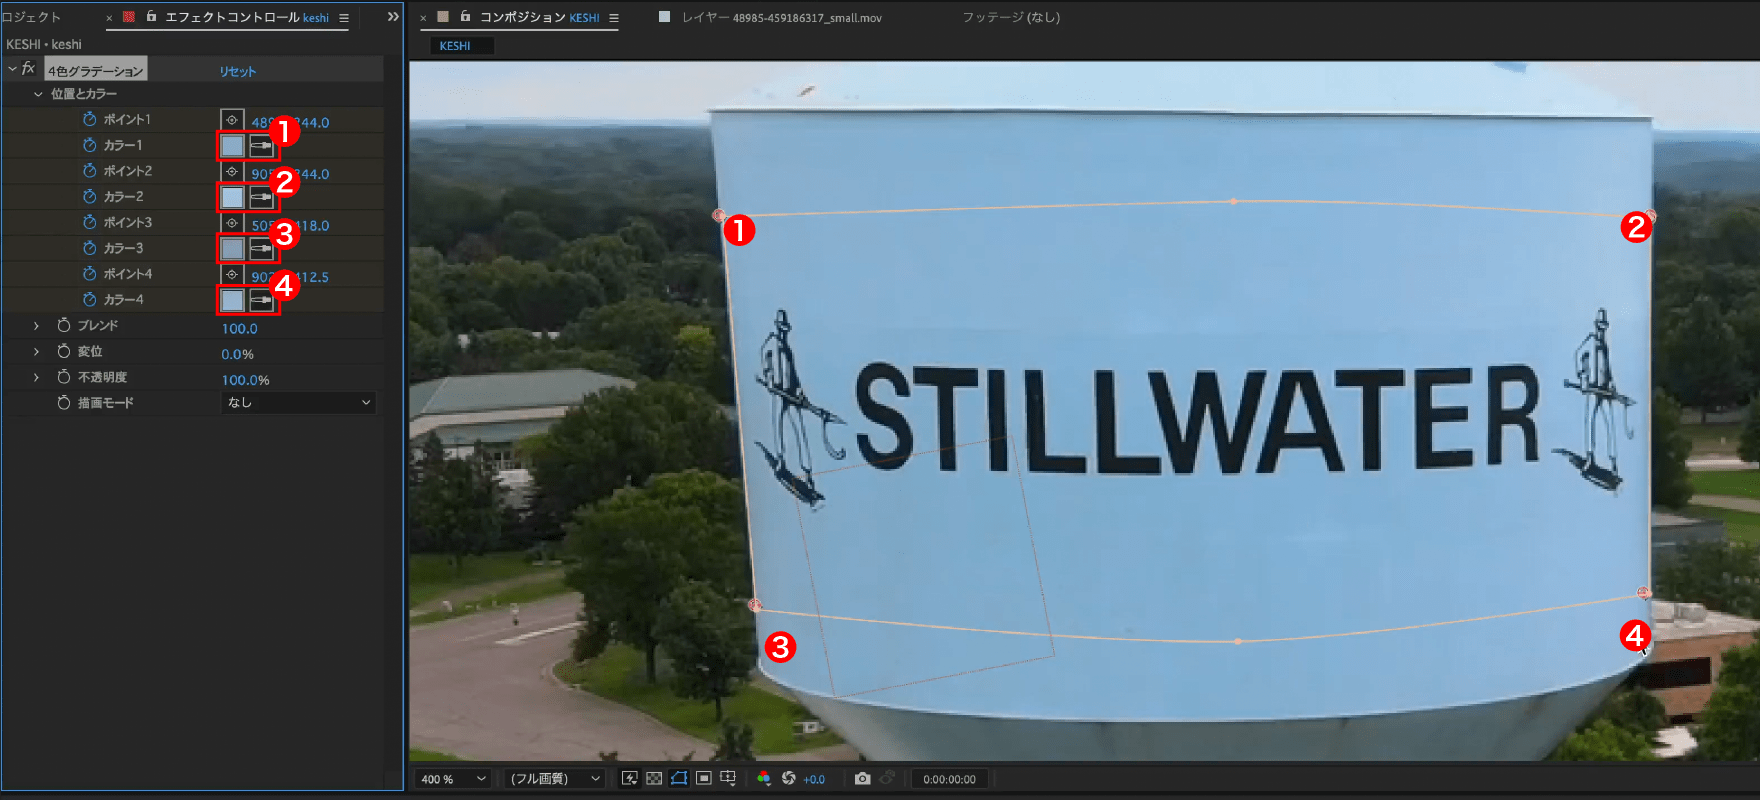
カラーはスポイトで色を拾います。
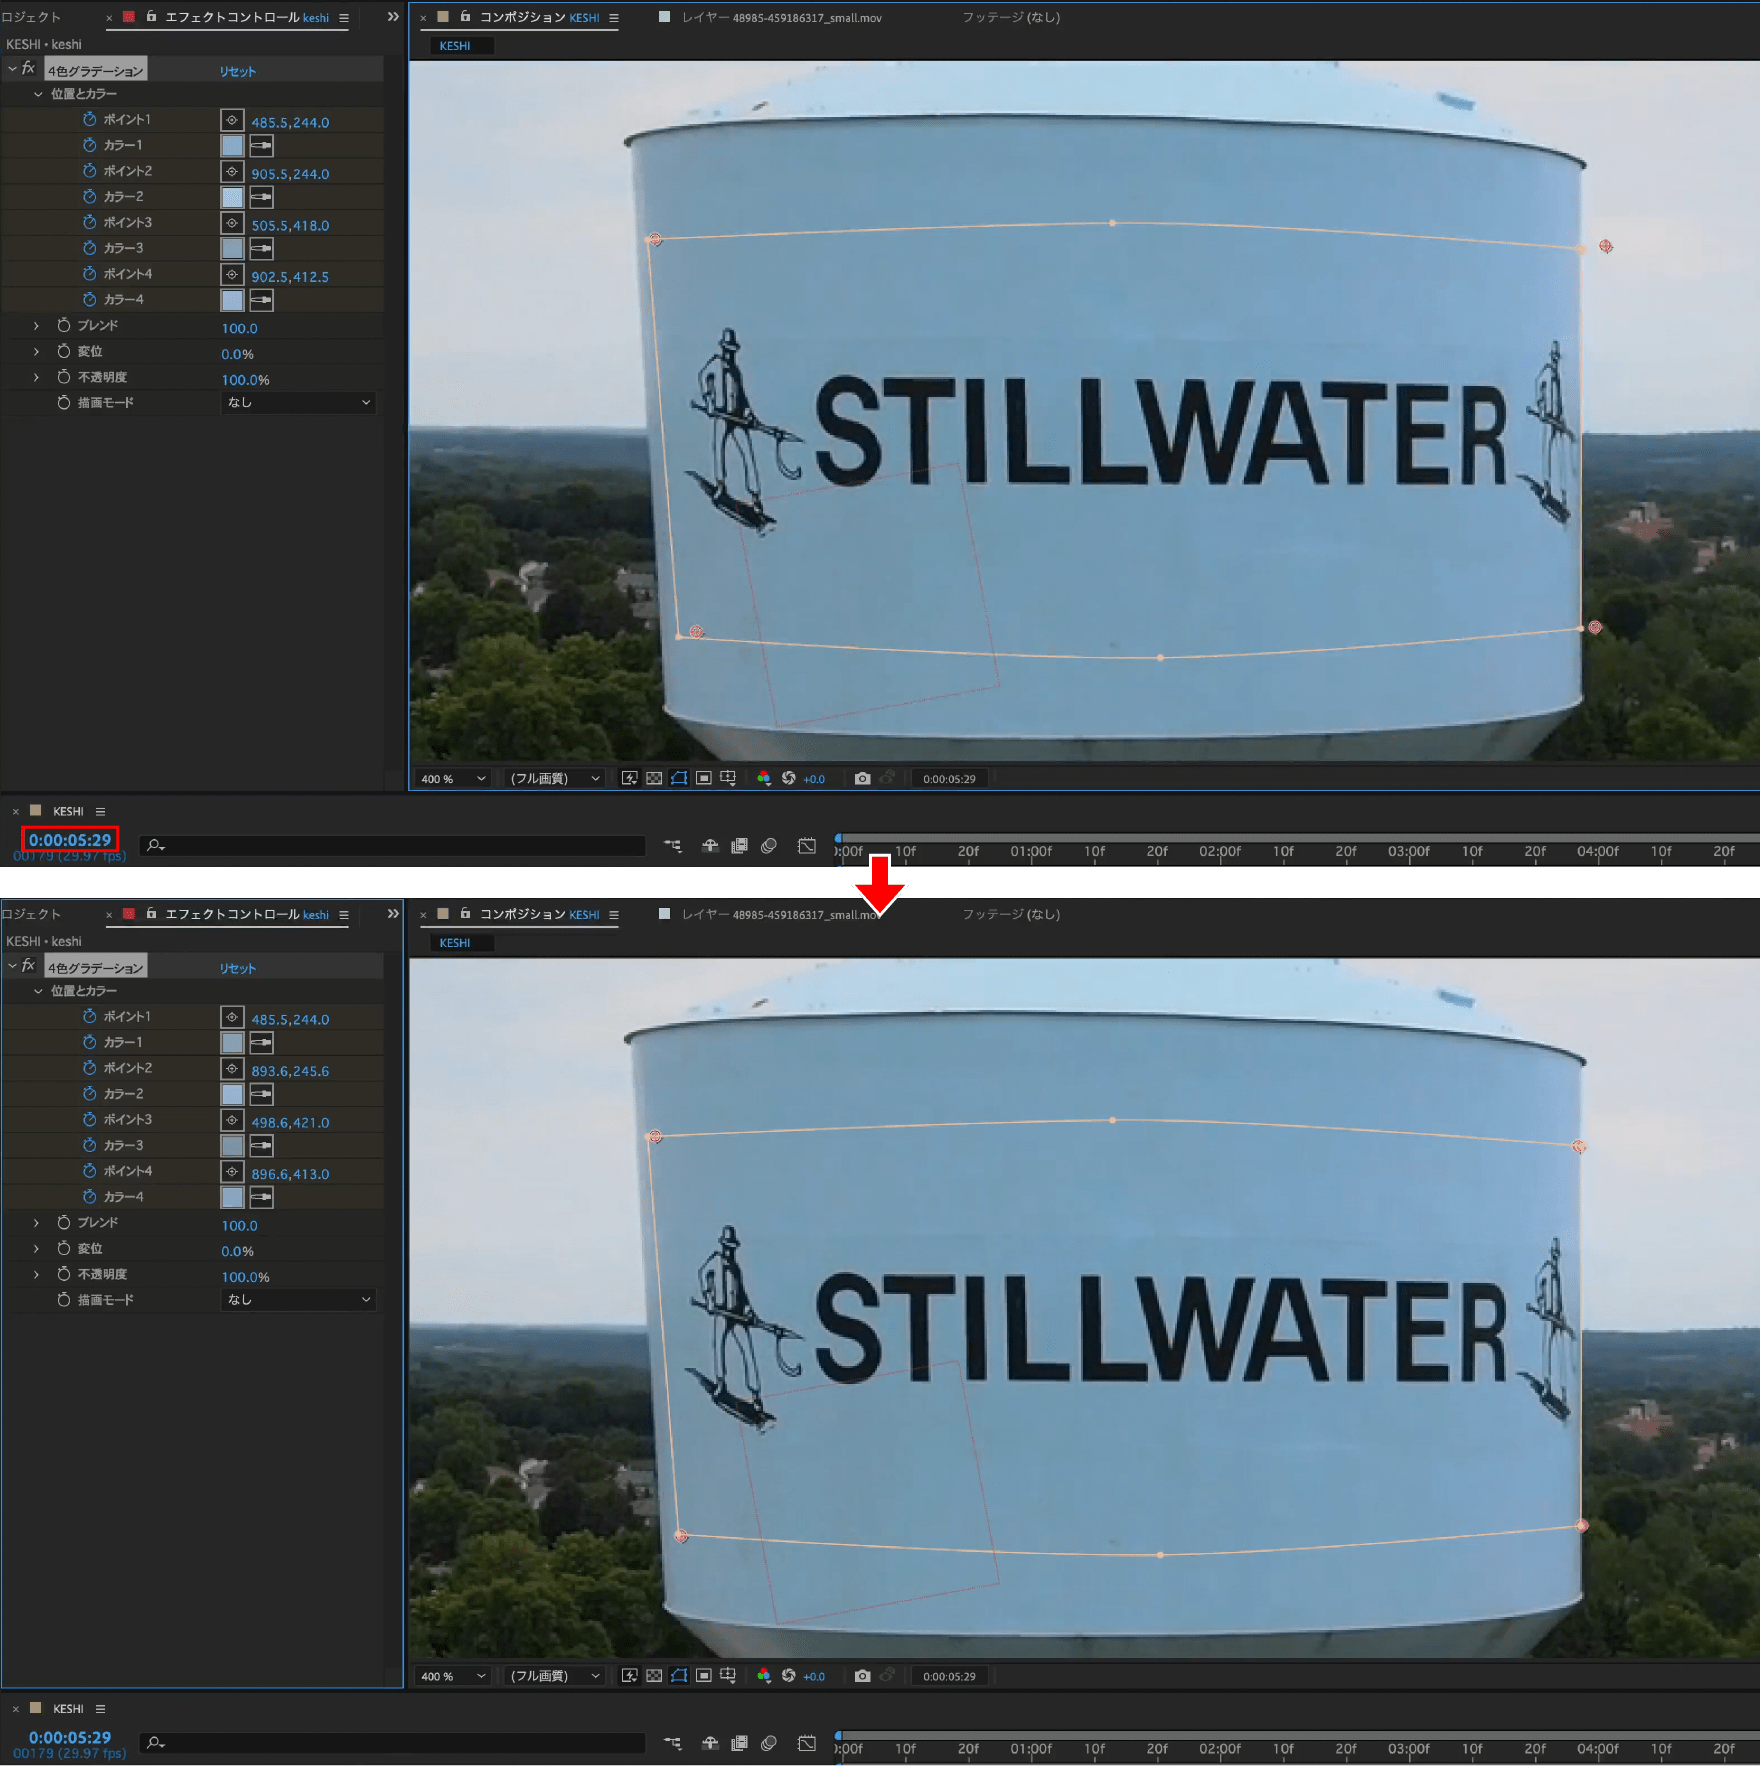
マスクパス同様終点のフレームに移動して調整を行います。

【keshi】を表示してインジケーターを移動させ、変化がある箇所は調整の繰り返しです。
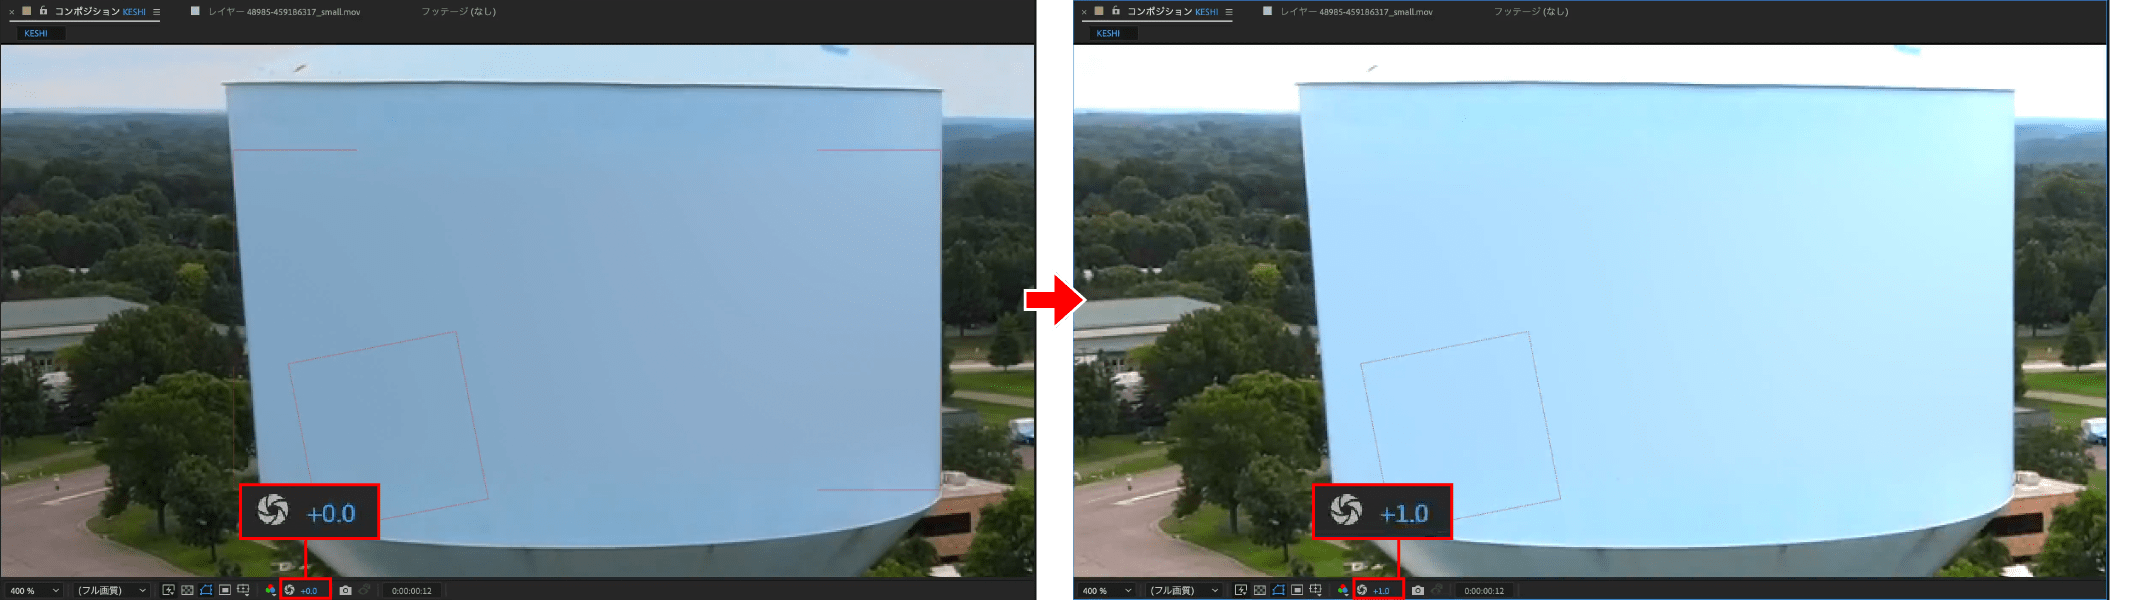
次に【露出調整】の数値を上げて再生し、マスクバレがないか確認をします。
色味を変えているので露出の数値を戻して再生し、色味の確認もします。
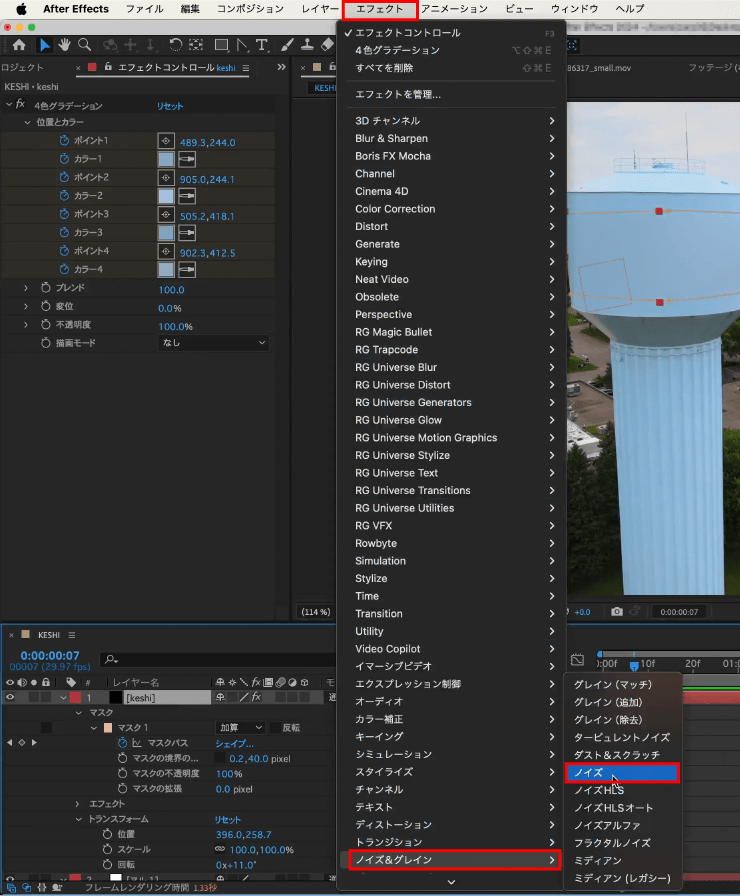
最後に映像と馴染ませるためにノイズを足します。
【keshi】を選択した状態で、メニューバーにある【エフェクト】をクリックし、【ノイズ&グレイン】から【ノイズ】をクリックします。
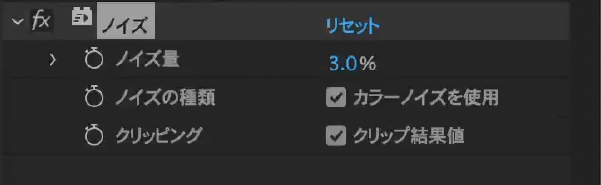
【ノイズ量】の値を【3】に変更します。

再生してマスク・質感に違和感がなければ、看板の文字の消しの完成です。
ロゴに差し替え
次に差し替え用の素材を準備します。
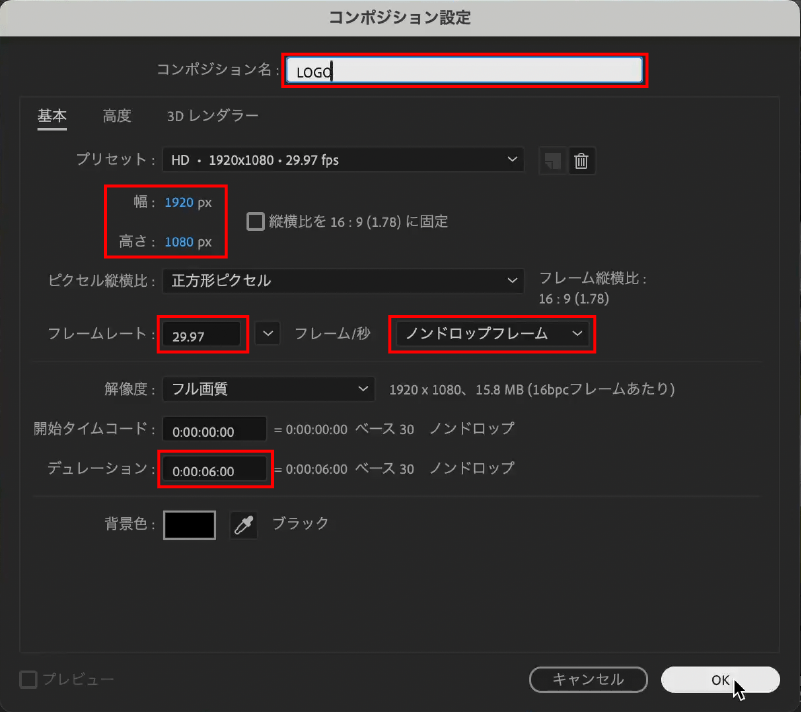
ショートカットキーcommand ⌘+Nで新規コンポジションを作成します。
コンポジション設定
- コンポジション名:LOGO
- 幅・高さ:1920×1080
- フレームレート:29.97/ノンドロップフレーム
- デュレーション:6:00
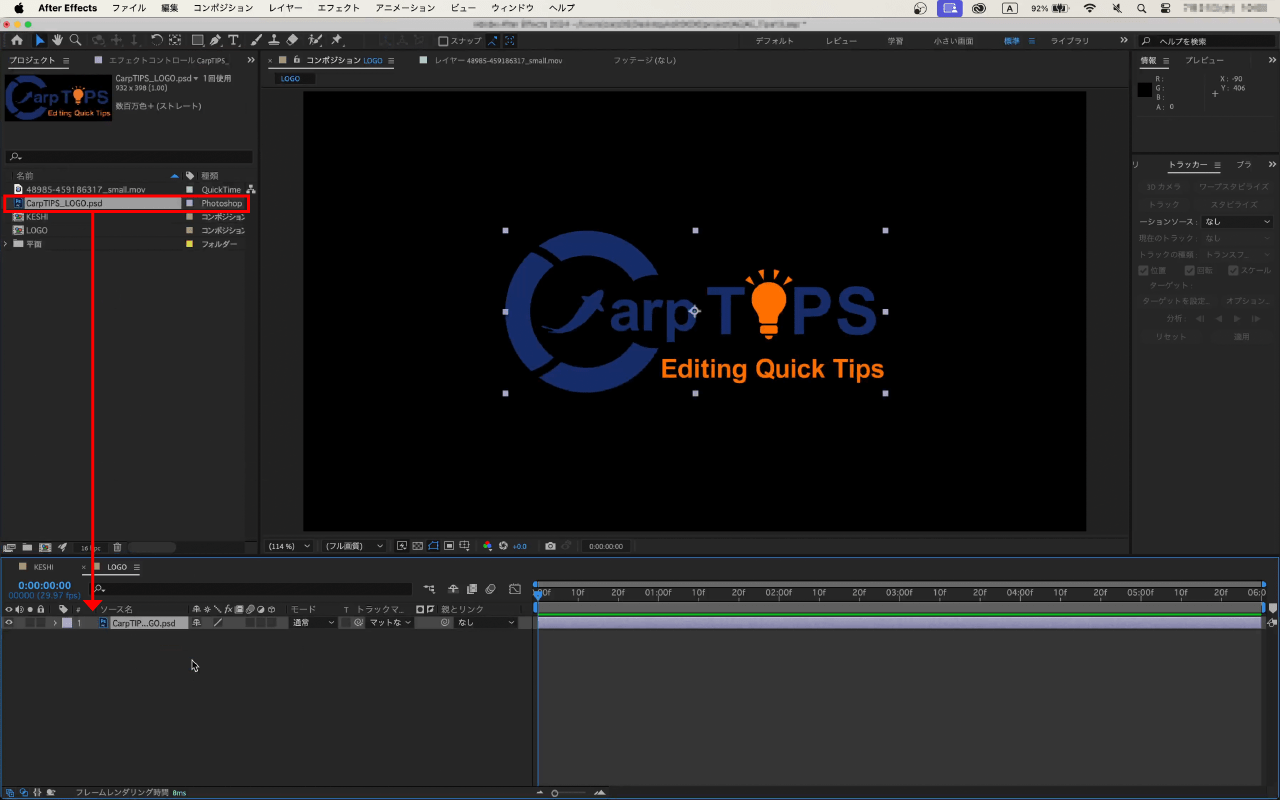
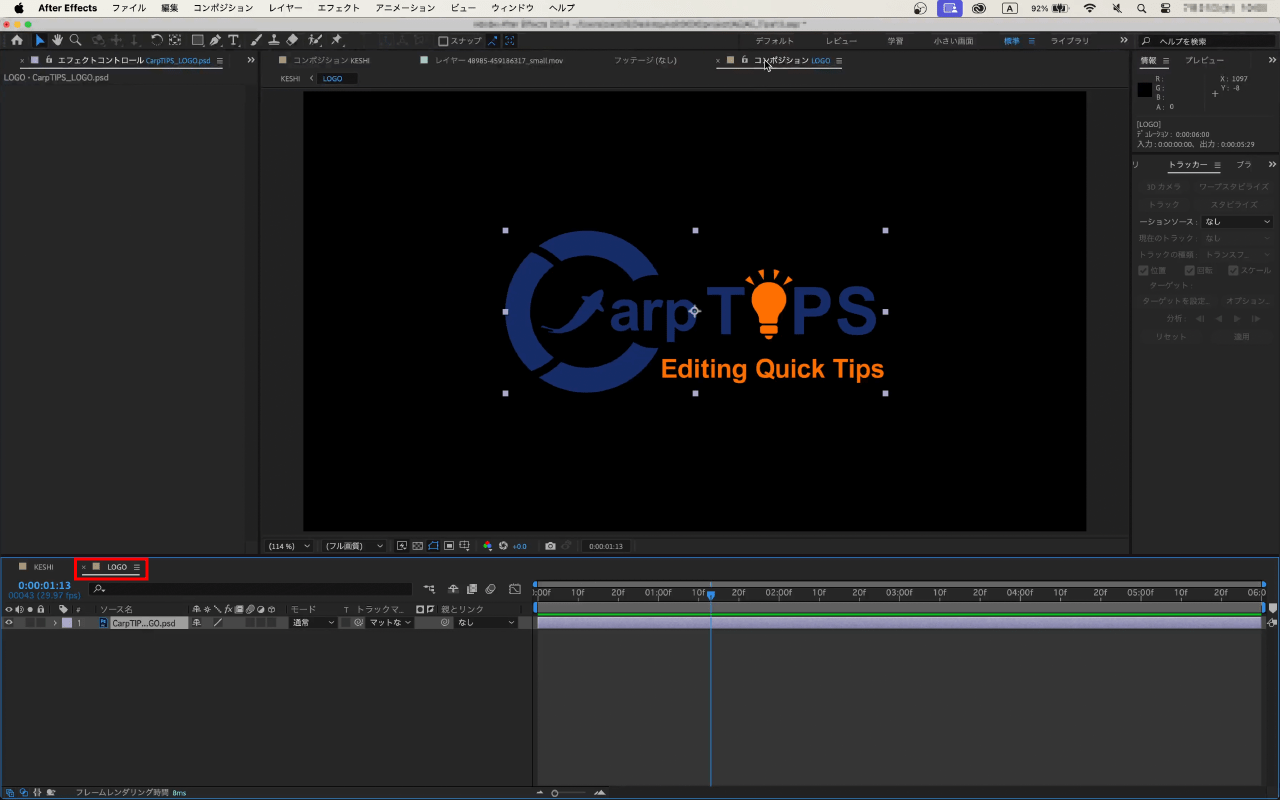
プロジェクトパネルにあるロゴデータをタイムラインパネルにドラッグ&ドロップします。
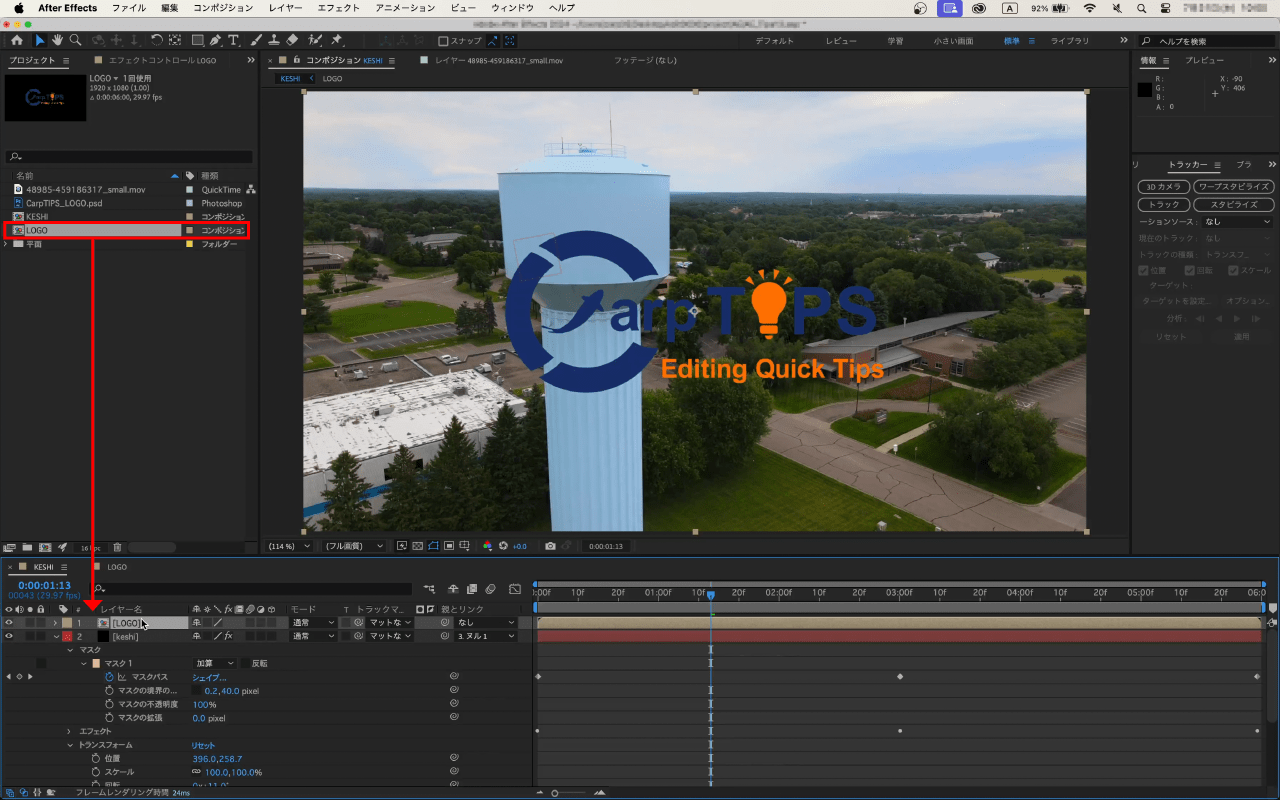
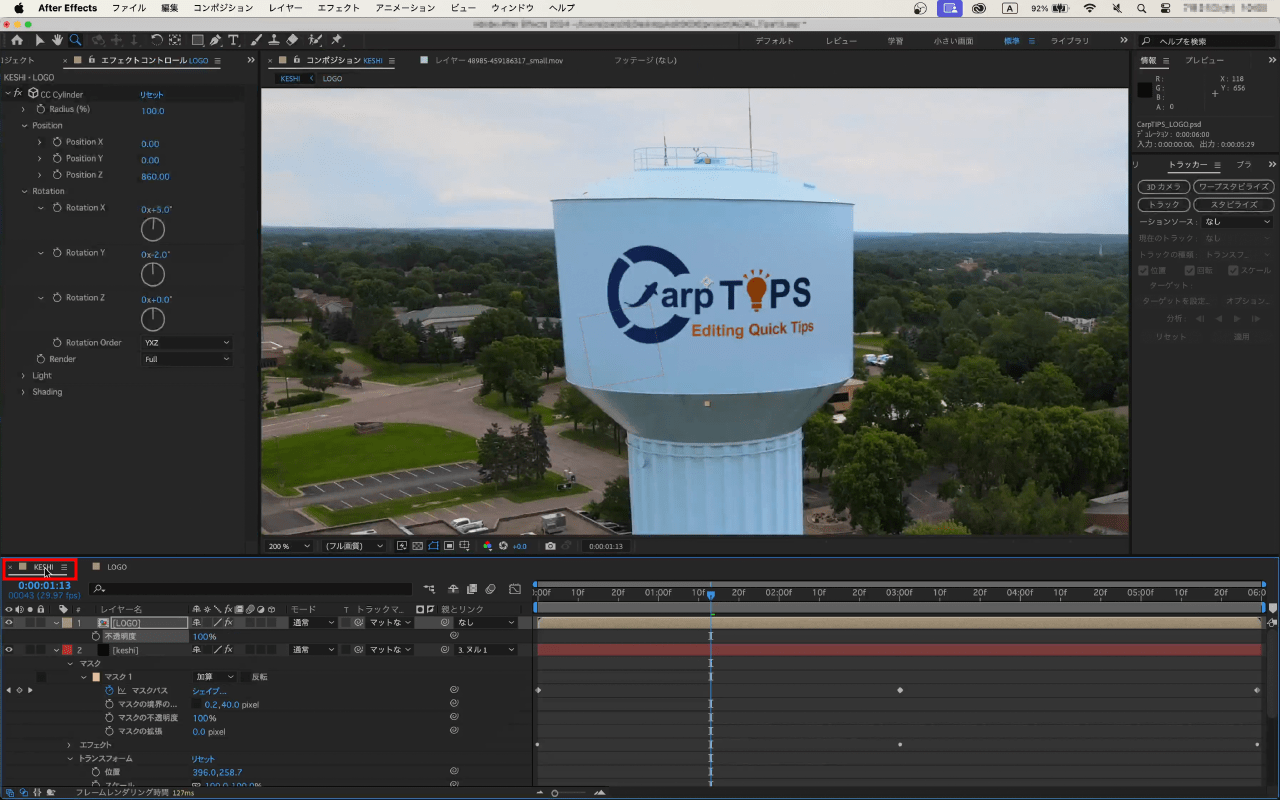
【KESHI】に戻って先程作成した【LOGO】をタイムラインパネルにドラッグ&ドロップします。
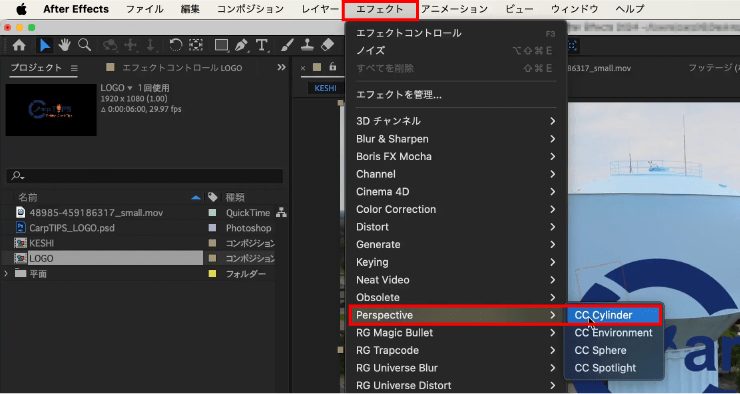
メニューバーにある【エフェクト】をクリックし、【Perspective】から【CC Cylinder】をクリックします。

【LOGO】の位置を看板の中央になるように調整します。
【LOGO】のスケールを調整します。
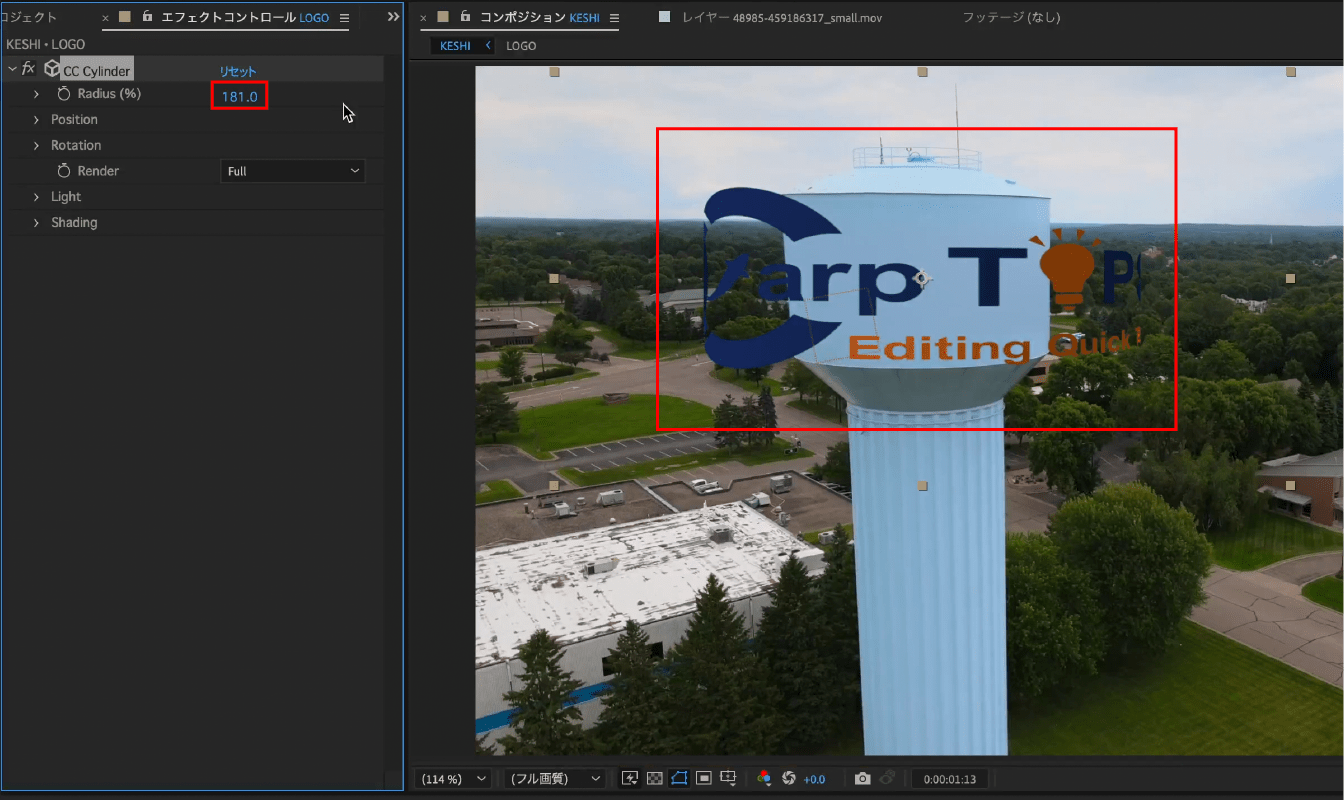
【Radius】でサイズを調整するとロゴが変形してしまうので、一旦ガイドを作成します。
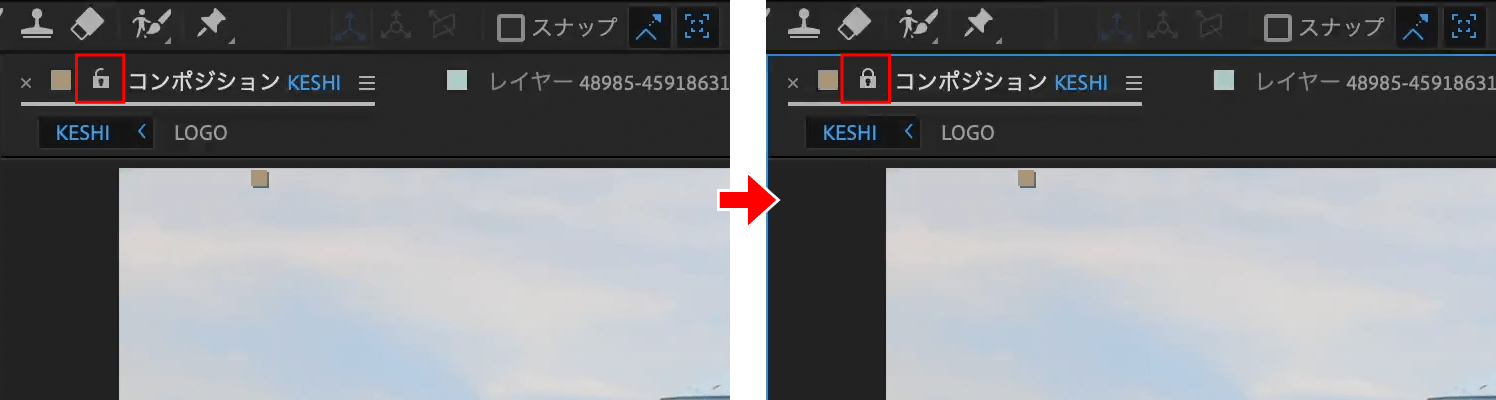
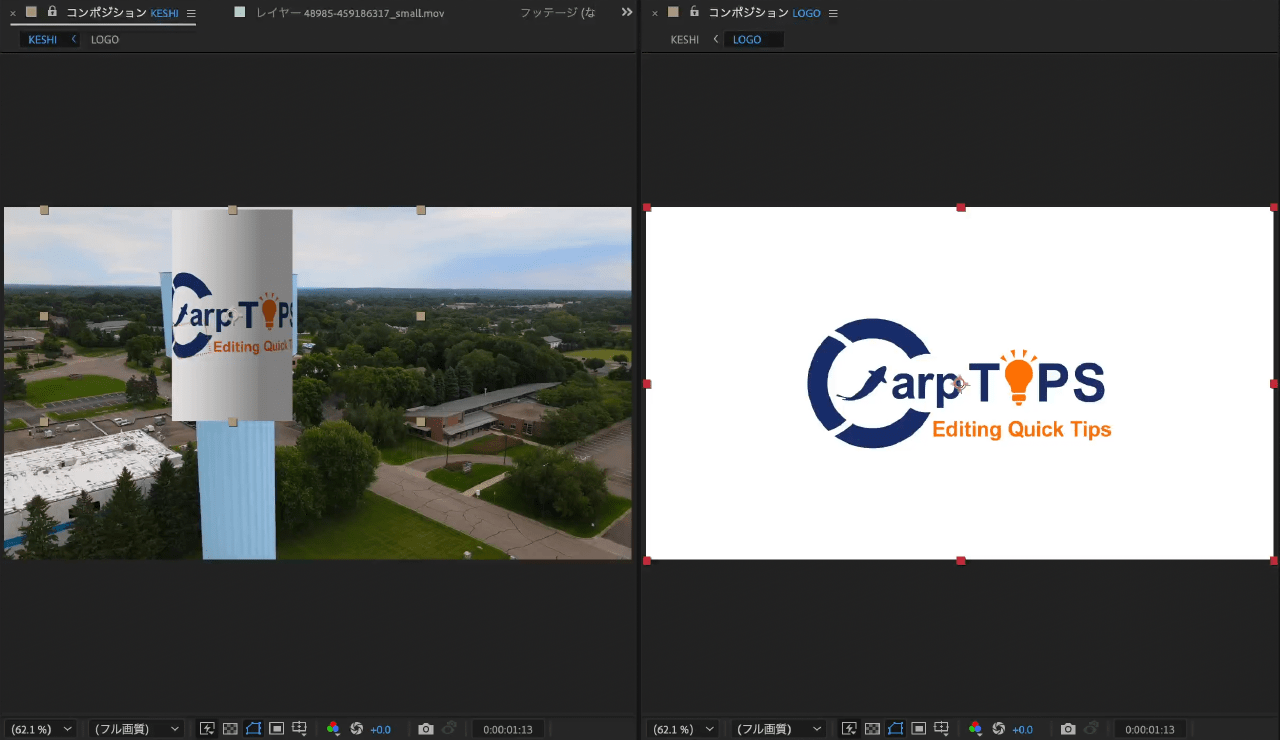
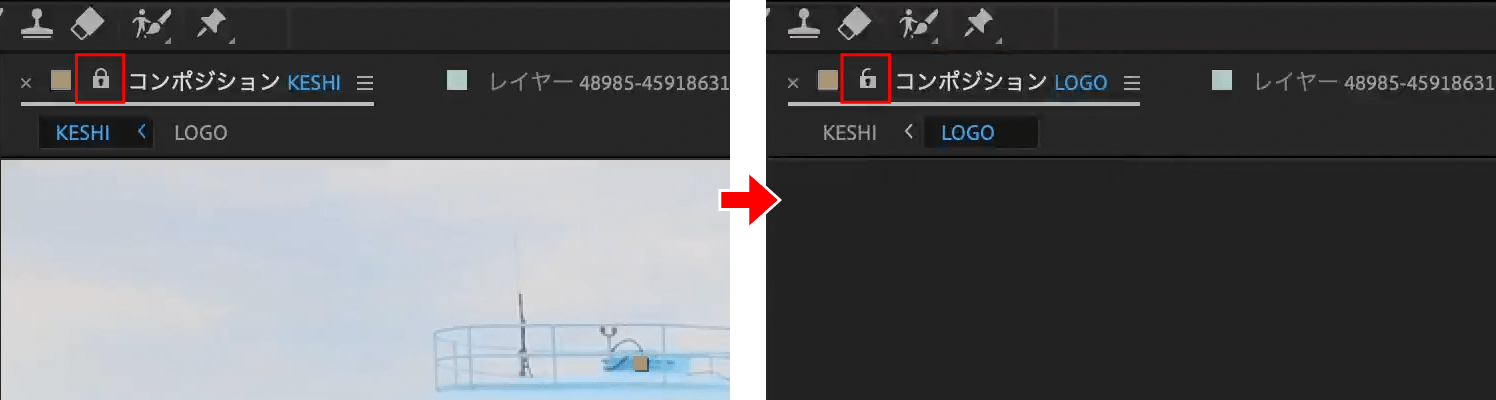
コンポジションパネルにある【ビューアのロックを切り替え】をクリックして、【KESHI】のビューアをロックします。

その状態で【LOGO】を開きます。
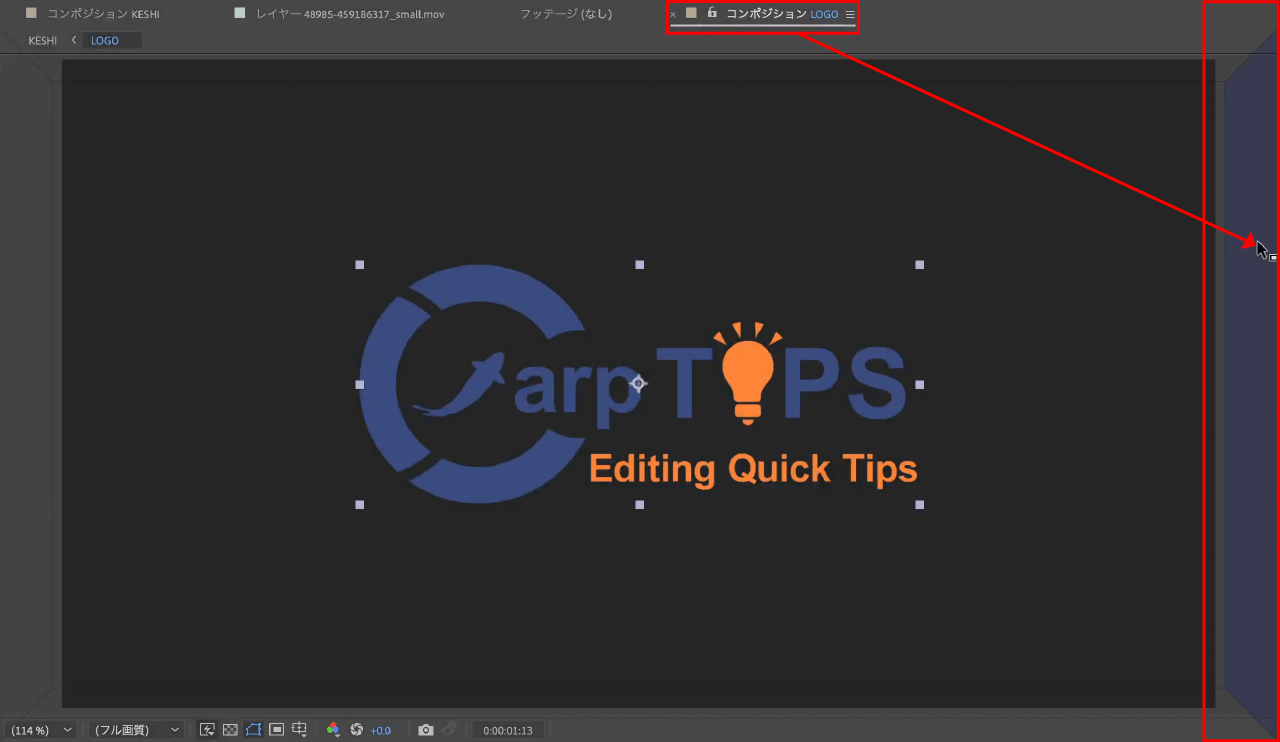
【LOGO】のコンポジションパネルを上図のようにドラッグするとドッキングゾーンが表示されます。
マウスボタンを離すと2画面になります。
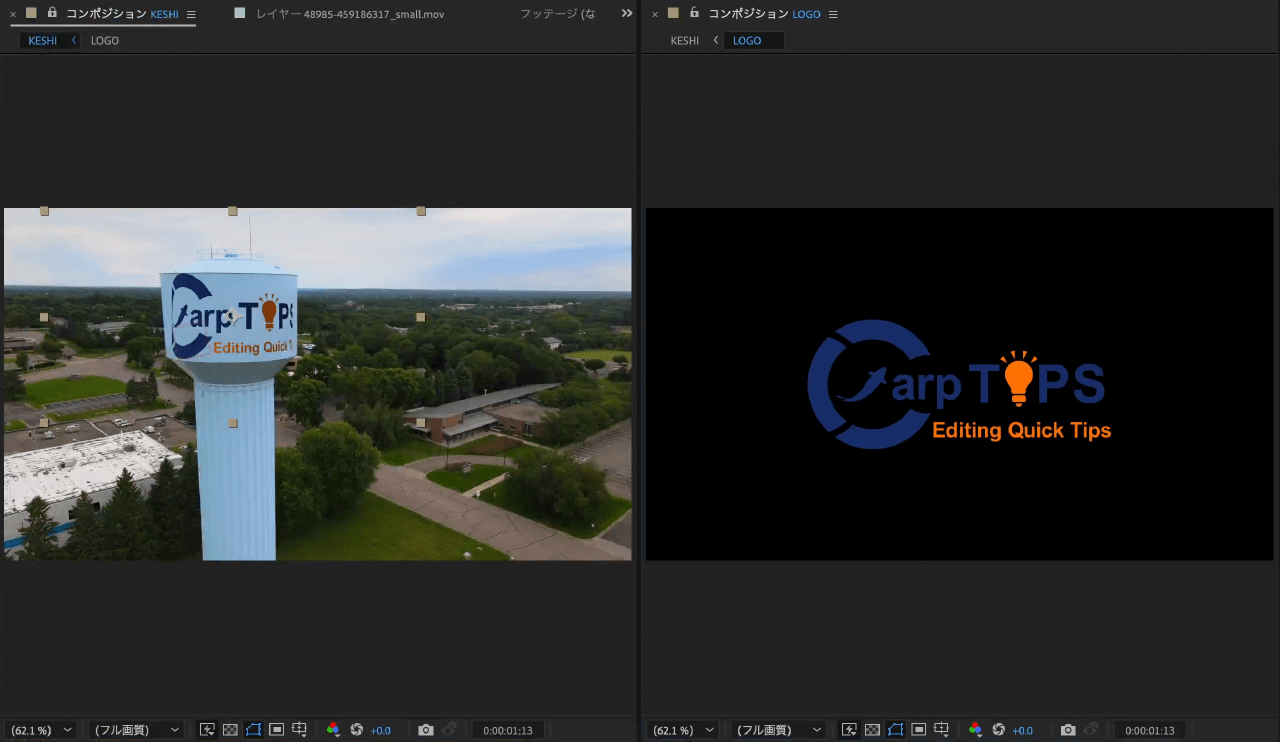
【LOGO】の中にショートカットキーcommand ⌘+Yで新規平面を作成します。
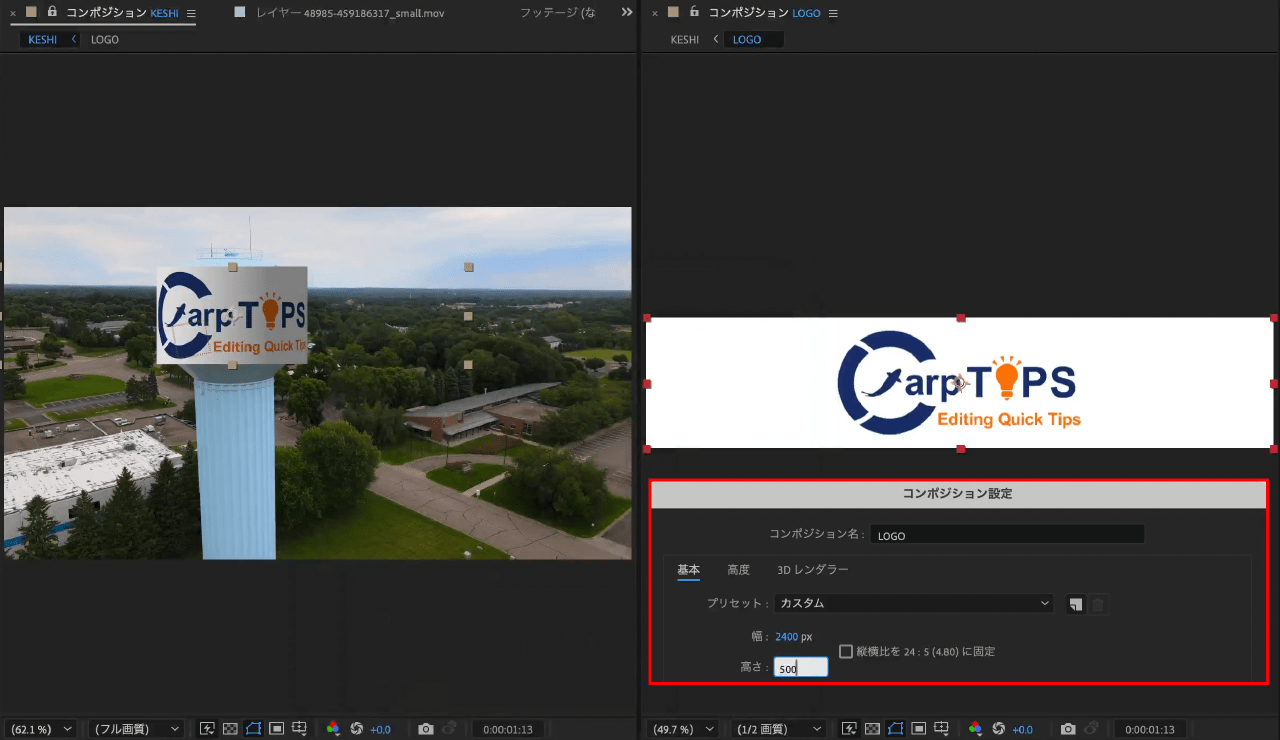
【Radius】の直径に合うように2画面で見ながら【LOGO】のコンポジションのサイズを変更します。
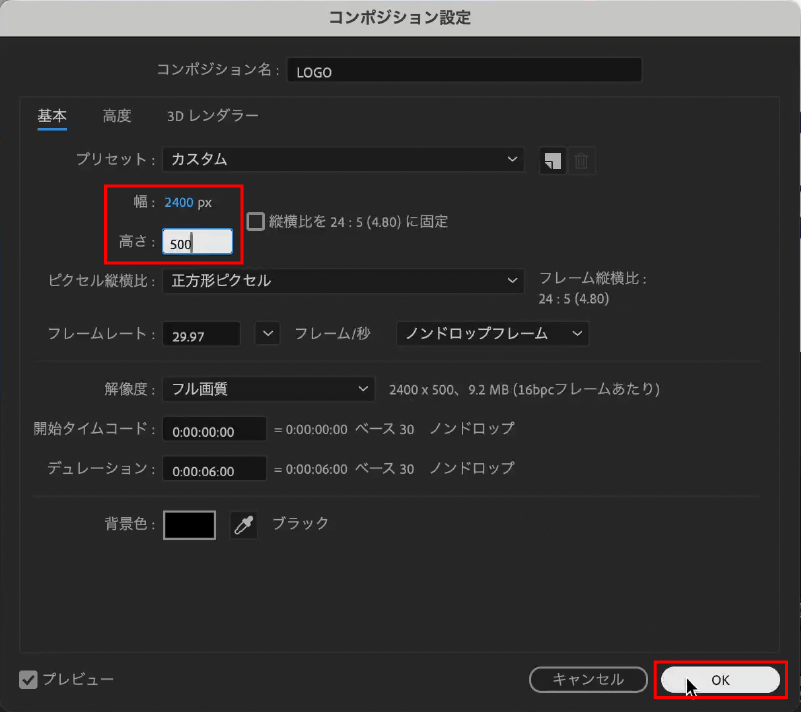
ショートカットキーcommand ⌘+Kでコンポジション設定ダイアログボックスを開き、サイズを変更し【OK】をクリックします。今回は以下のように変更しています。
コンポジション設定
- 幅・高さ:2400×500
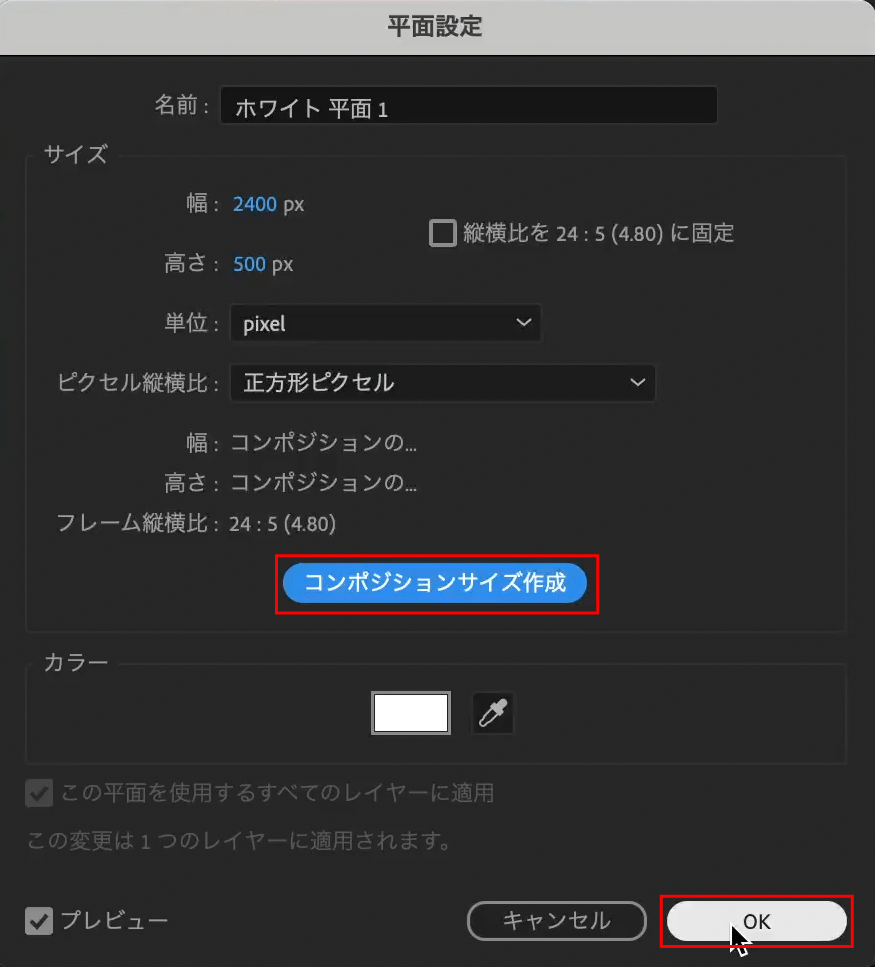
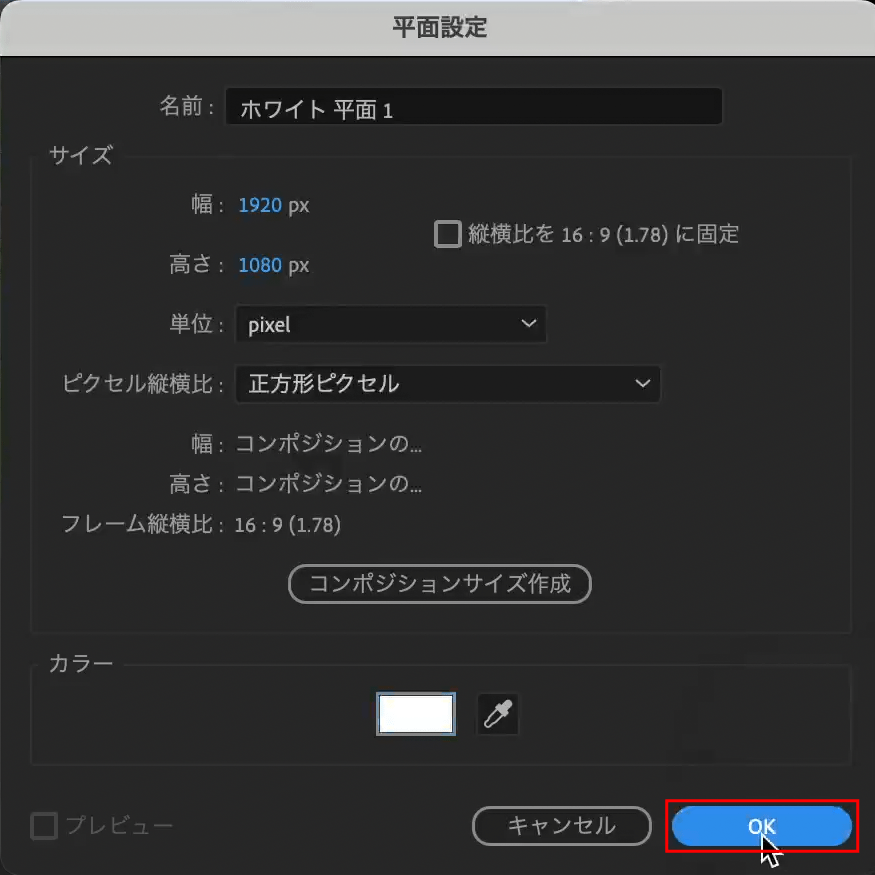
この時、平面もコンポジションサイズに合わせます。ショートカットキーcommand ⌘+shift ⇧+Yで平面設定ダイアログボックスを開き、【コンポジションサイズ作成】をクリックし【OK】をクリックします。
これで直径が合いました。
調整ができたら【KESHI】に戻ります。
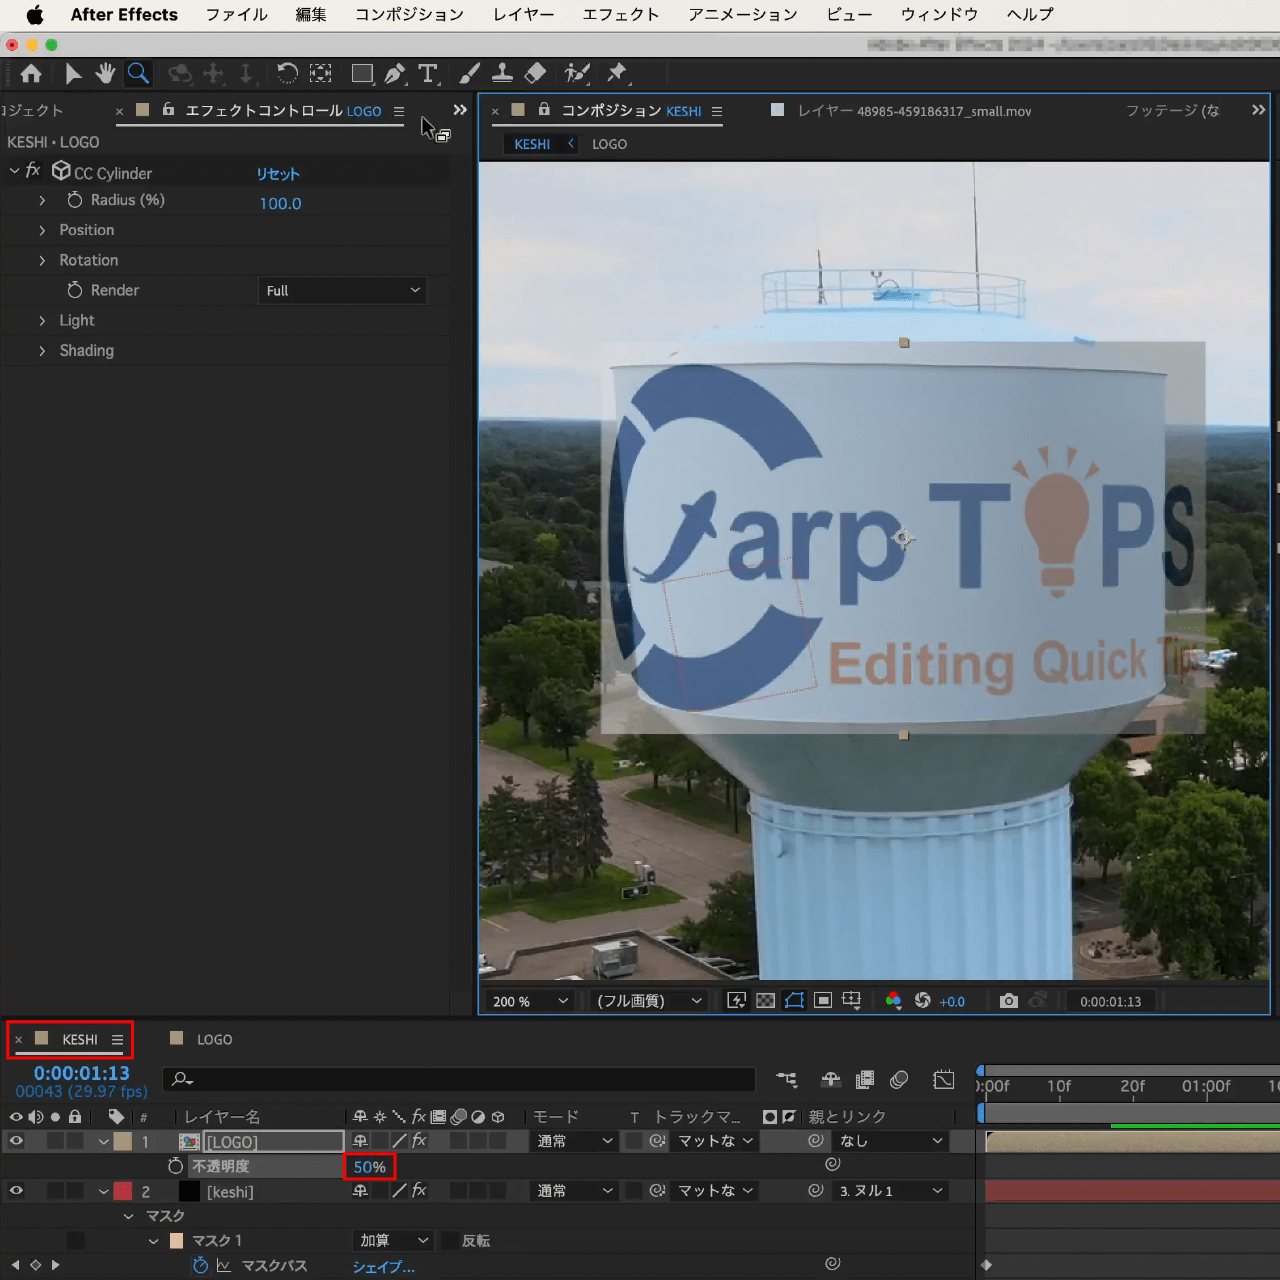
ショートカットキーTで【LOGO】の不透明度を開き、値を【50】に変更し、これをガイドに調整していきます。
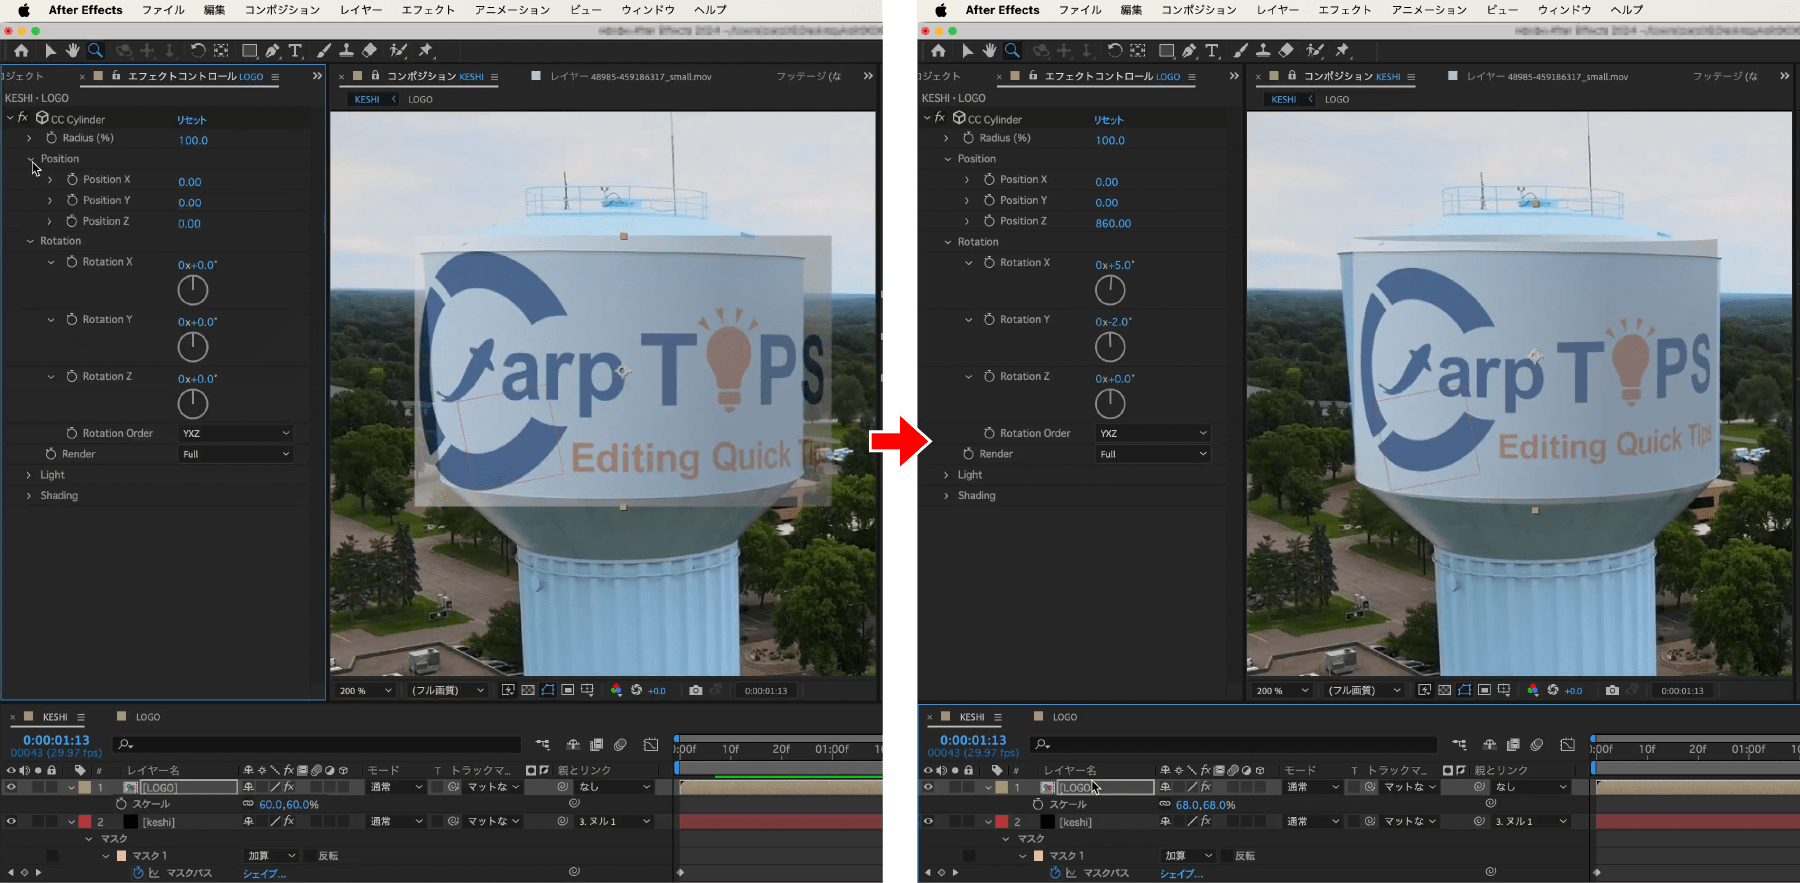
ガイドを見ながら位置・スケールを調整し、【Rotation】でパース感を合わせます。
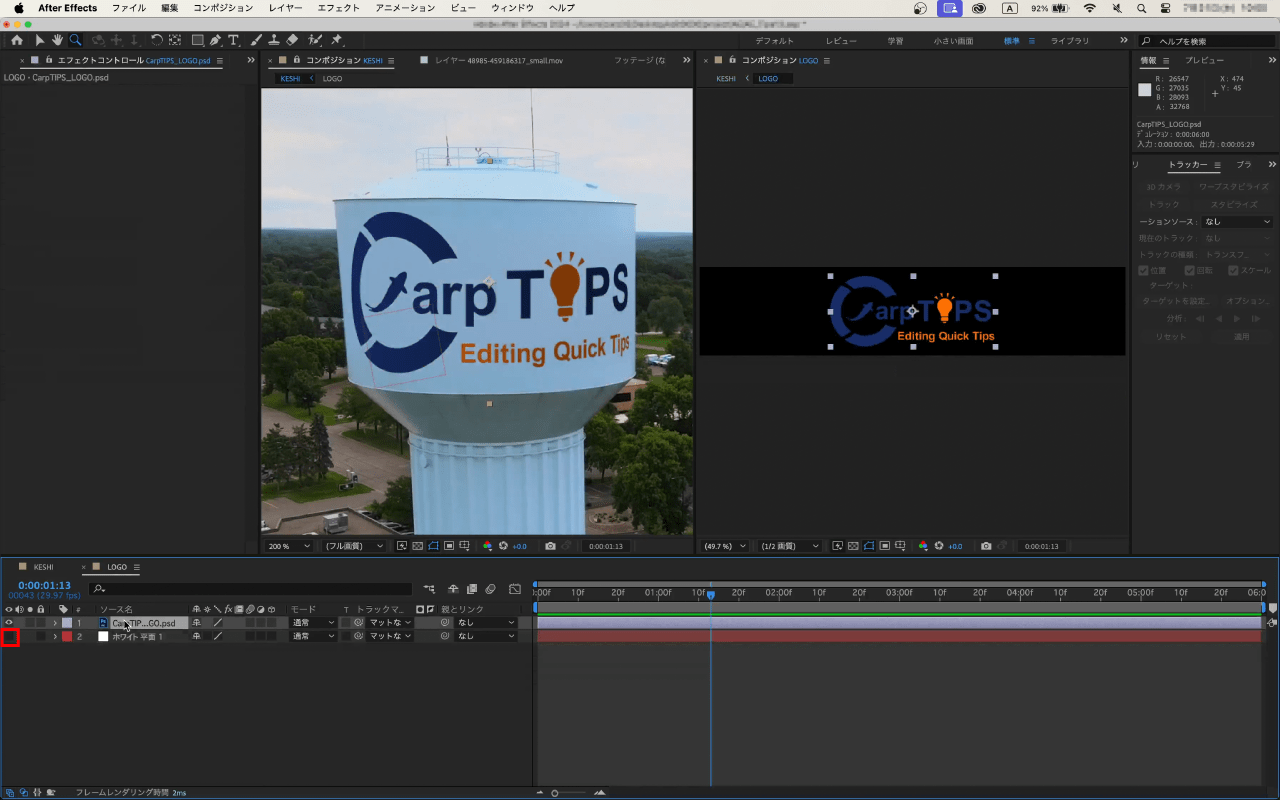

調整ができたら、ガイドの【ホワイト平面1】を非表示にします。
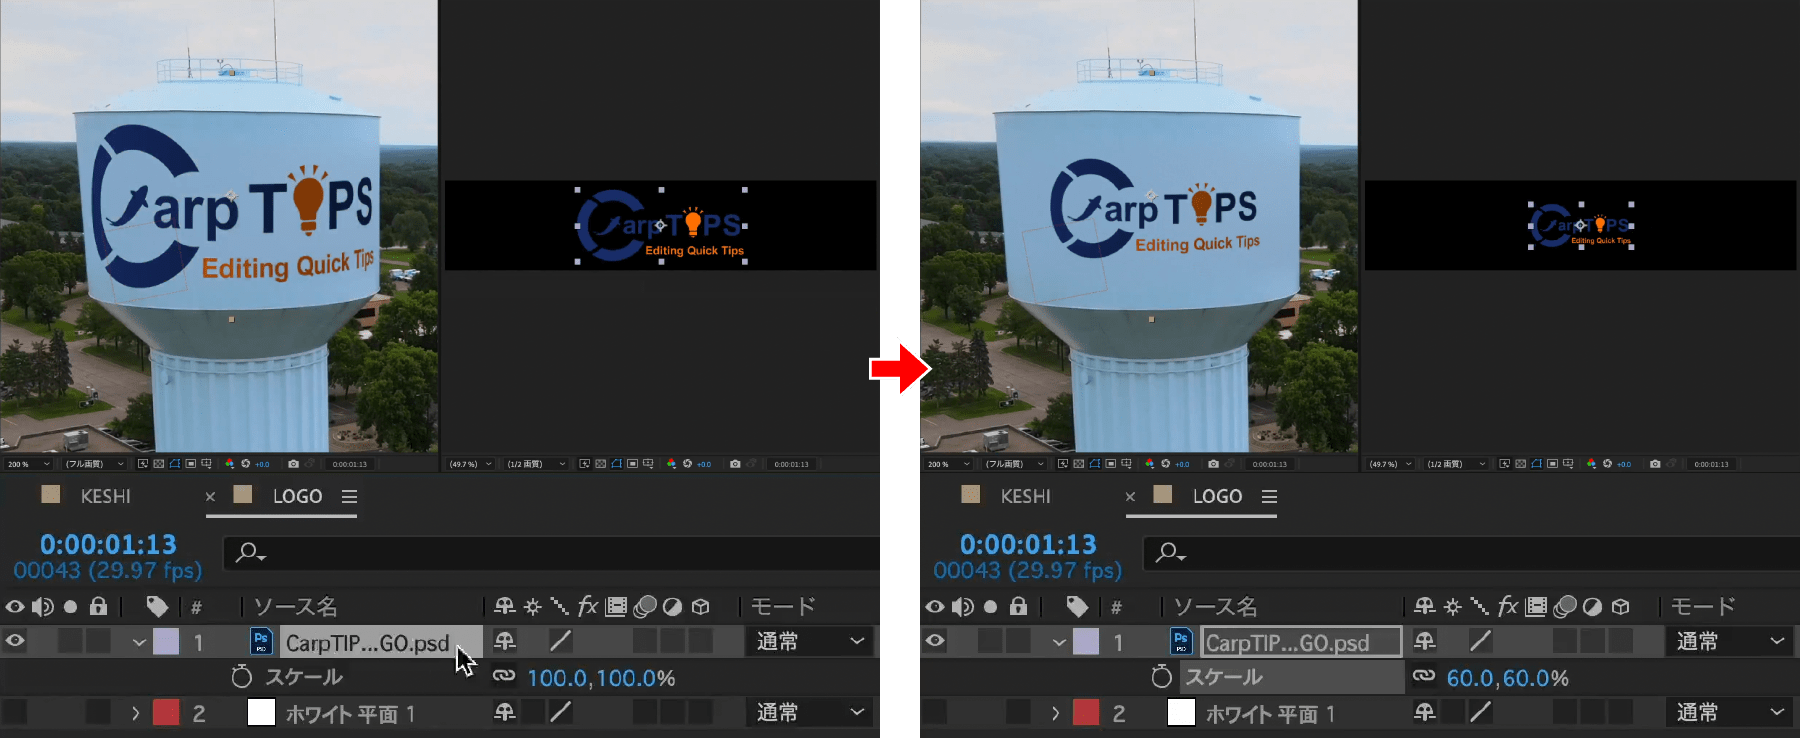
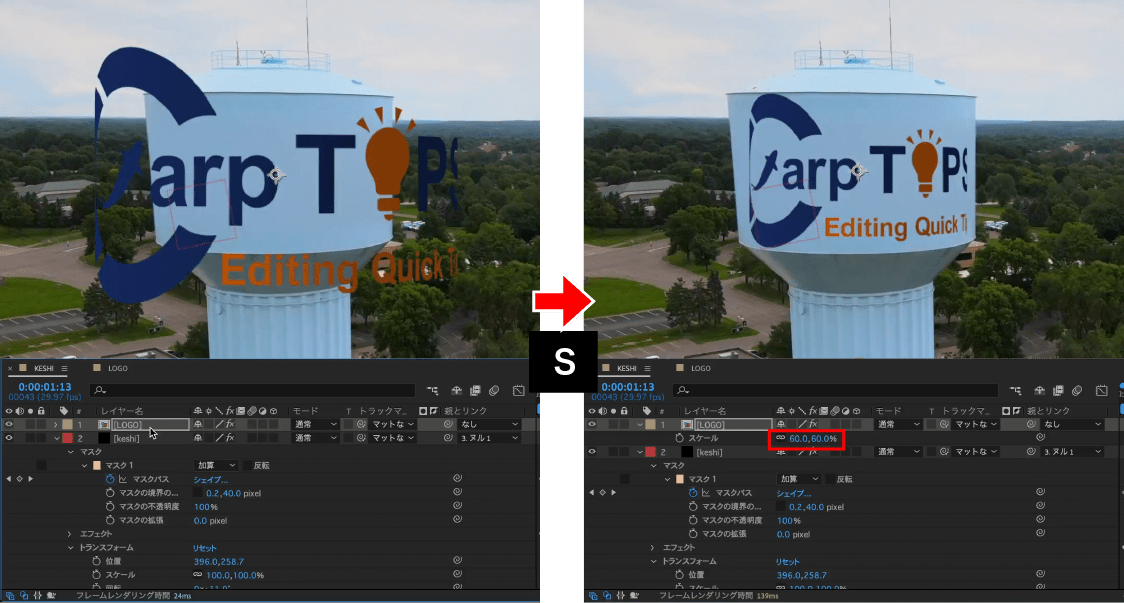
ロゴのサイズを調整します。
【ビューアのロックを切り替え】を解除します。
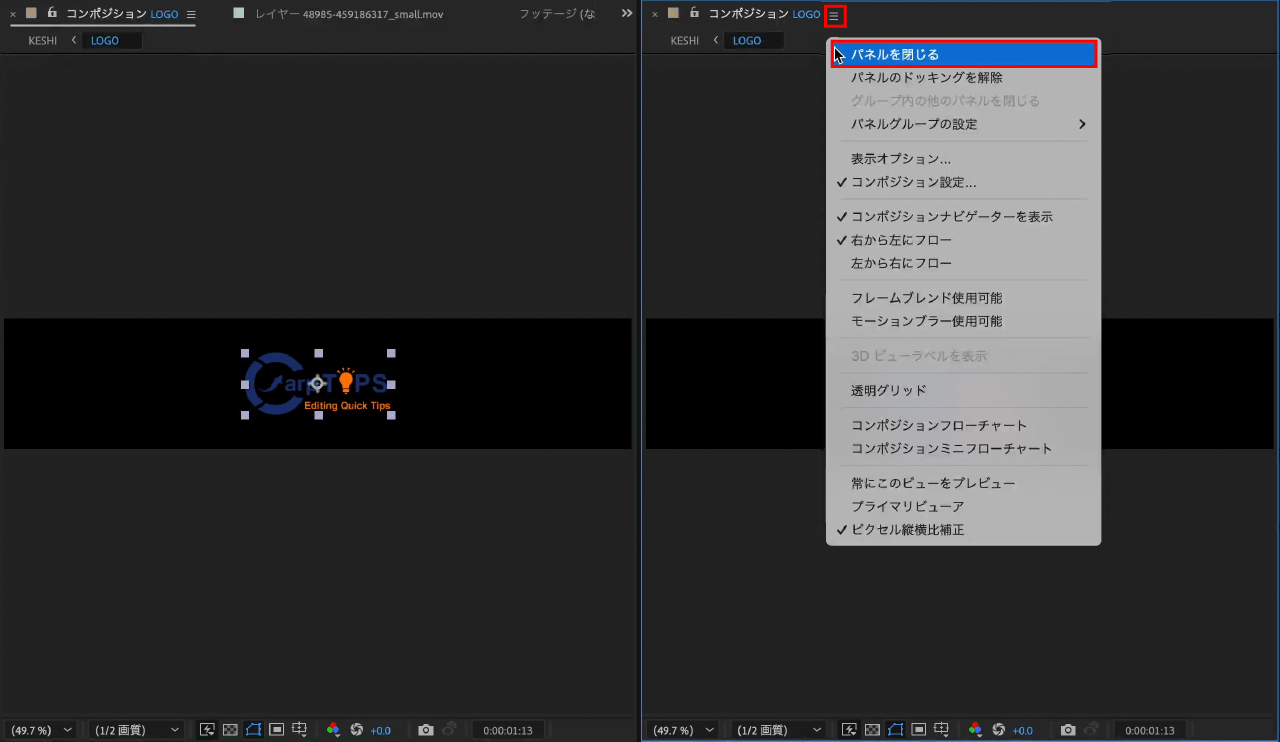
重複したコンポジションパネルを1つ閉じます。

【KESHI】に戻ります。
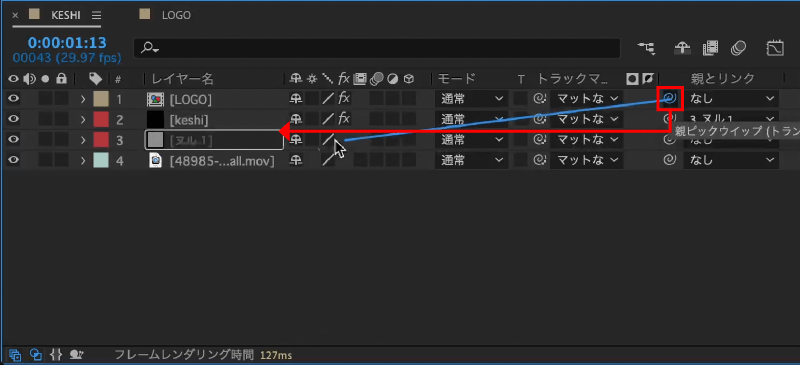
【LOGO】の【親ピックウイップ】を【ヌル 1】に繋げます。
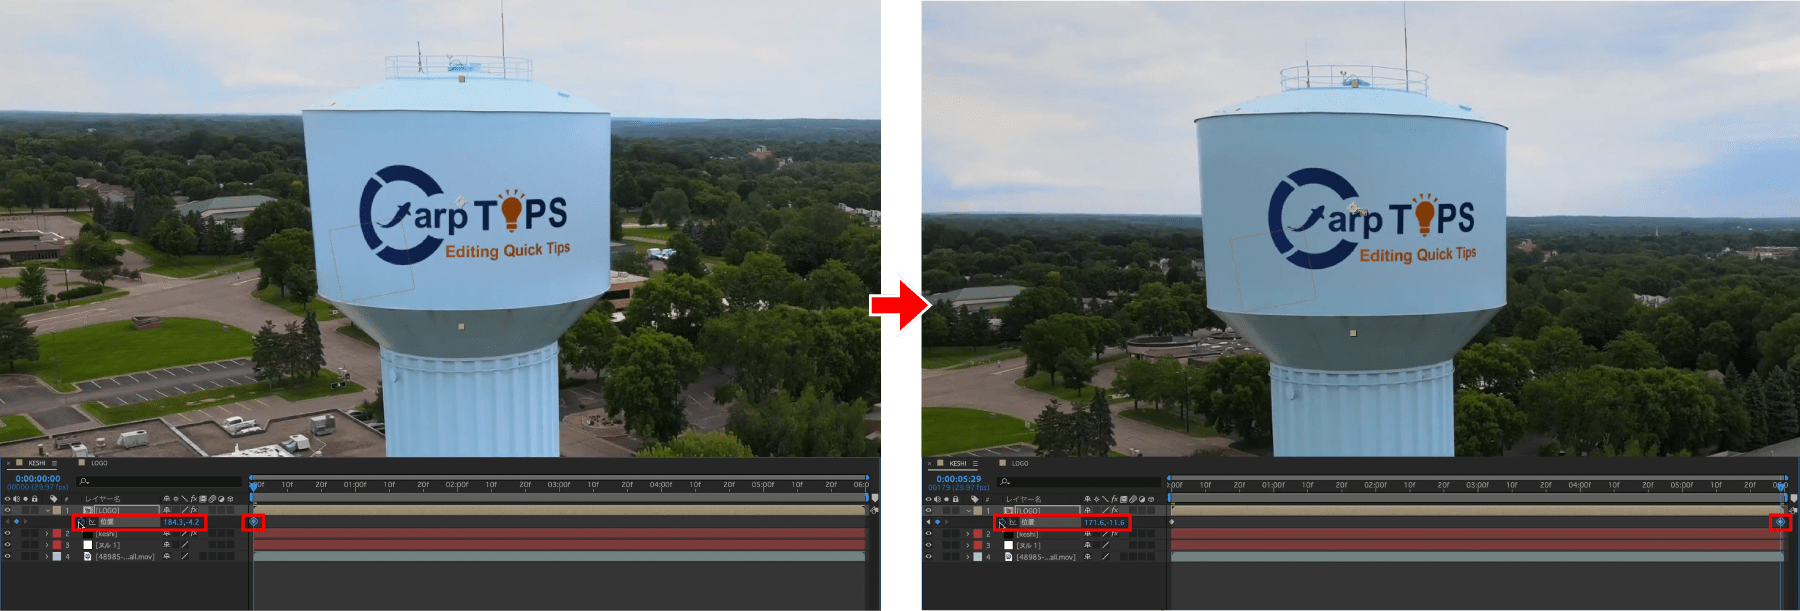
素材の位置と合うように始点と終点にキーフレームを打って調整します。
映像に馴染ませる
再生して確認してみます。

あとはもう少し馴染ませるようにブラーやノイズを使って調整します。
まず【CC Cylinder】の値を以下のように変更します。
CC Cylinder設定
- Light
- Light Intensity:0
- Shading
- Ambient:80
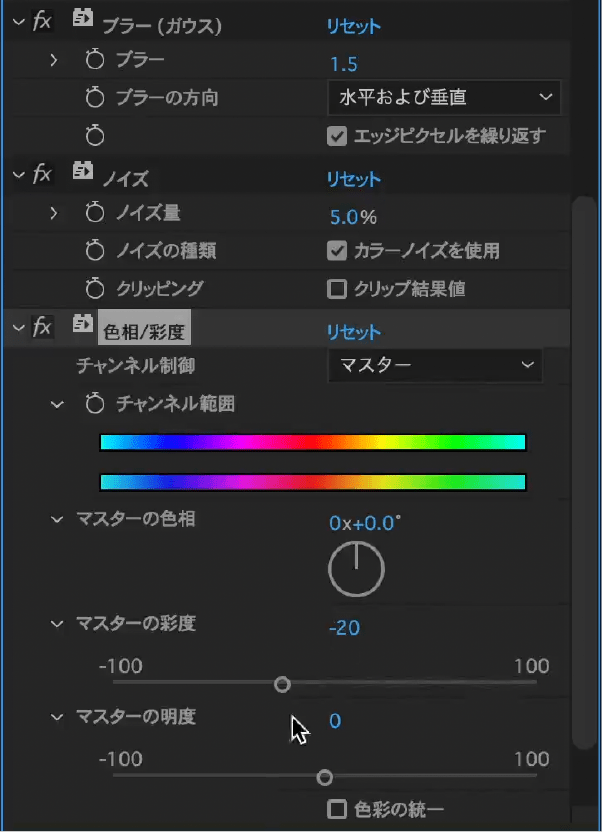
今回は【LOGO】に【ブラー(ガウス)】、【ノイズ】、【色相/彩度】のエフェクトを適用し値を以下のようにしています。
ブラー(ガウス)設定
- ブラー:1.5
ノイズ設定
- ノイズ量:5.0
- クリッピング:クリップ結果値のチェックを外す
色相/彩度設定
- マスターの彩度:-20
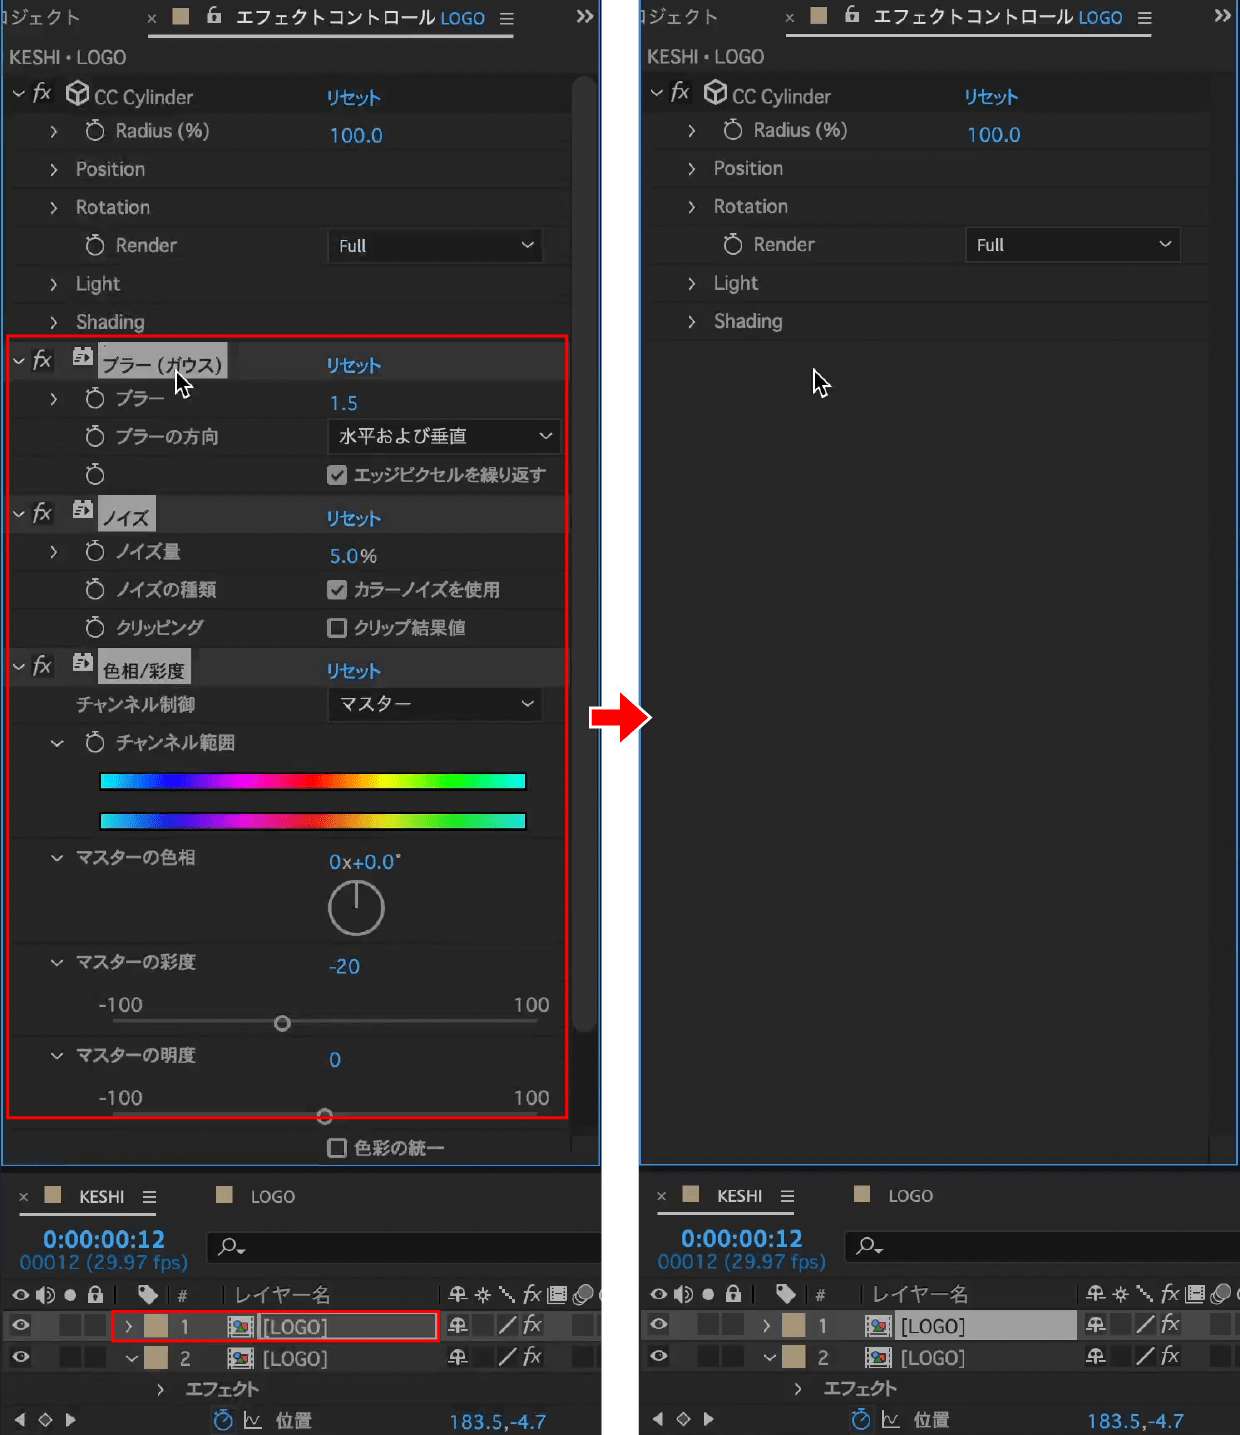
【LOGO】をショートカットキーcommand ⌘+Dで複製し、【CC Cylinder】以外のエフェクトを削除します。

複製した【LOGO】に【グラデーション】を適用し、描画モードを【乗算】にします。
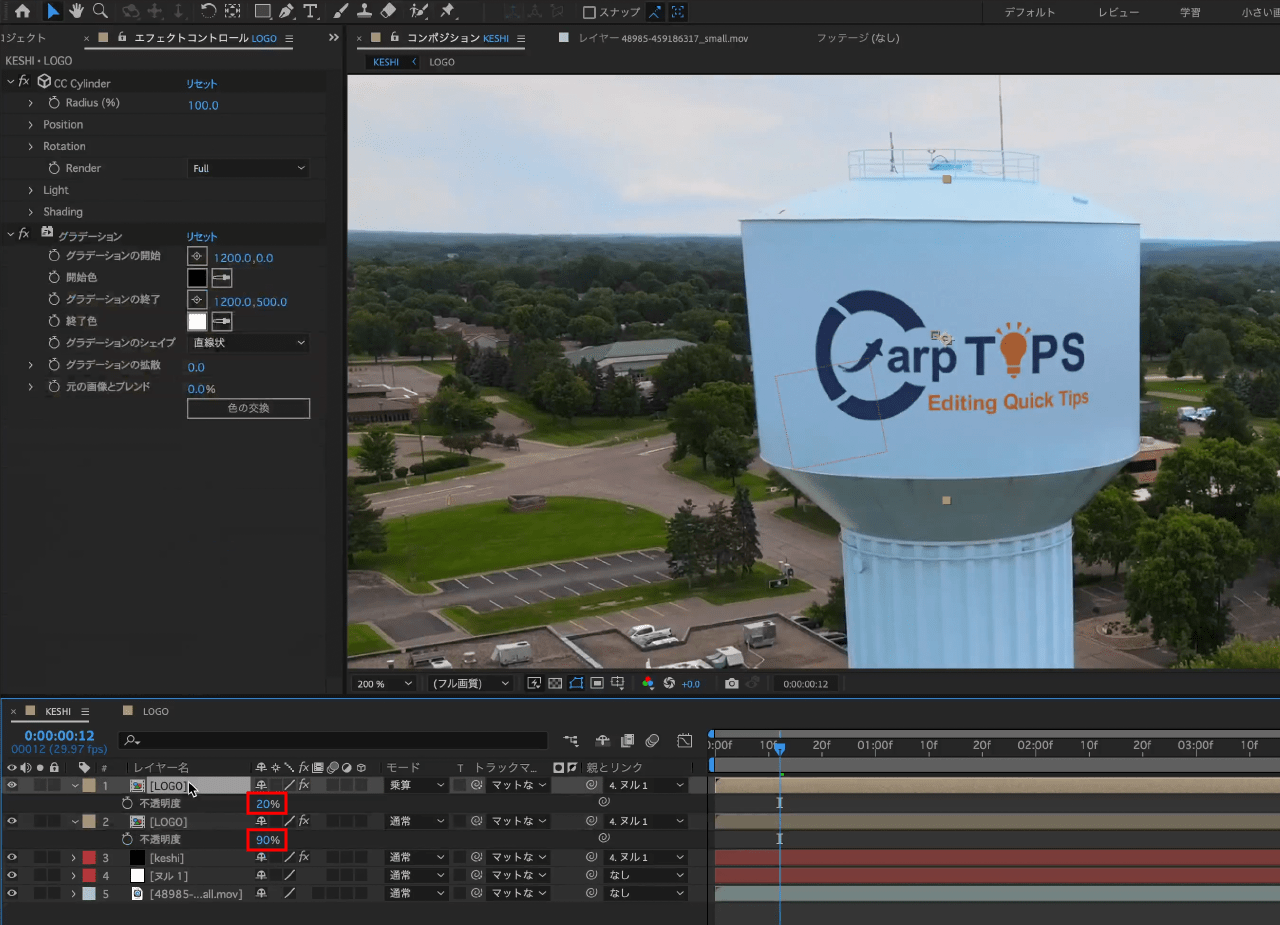
不透明度を調整します。
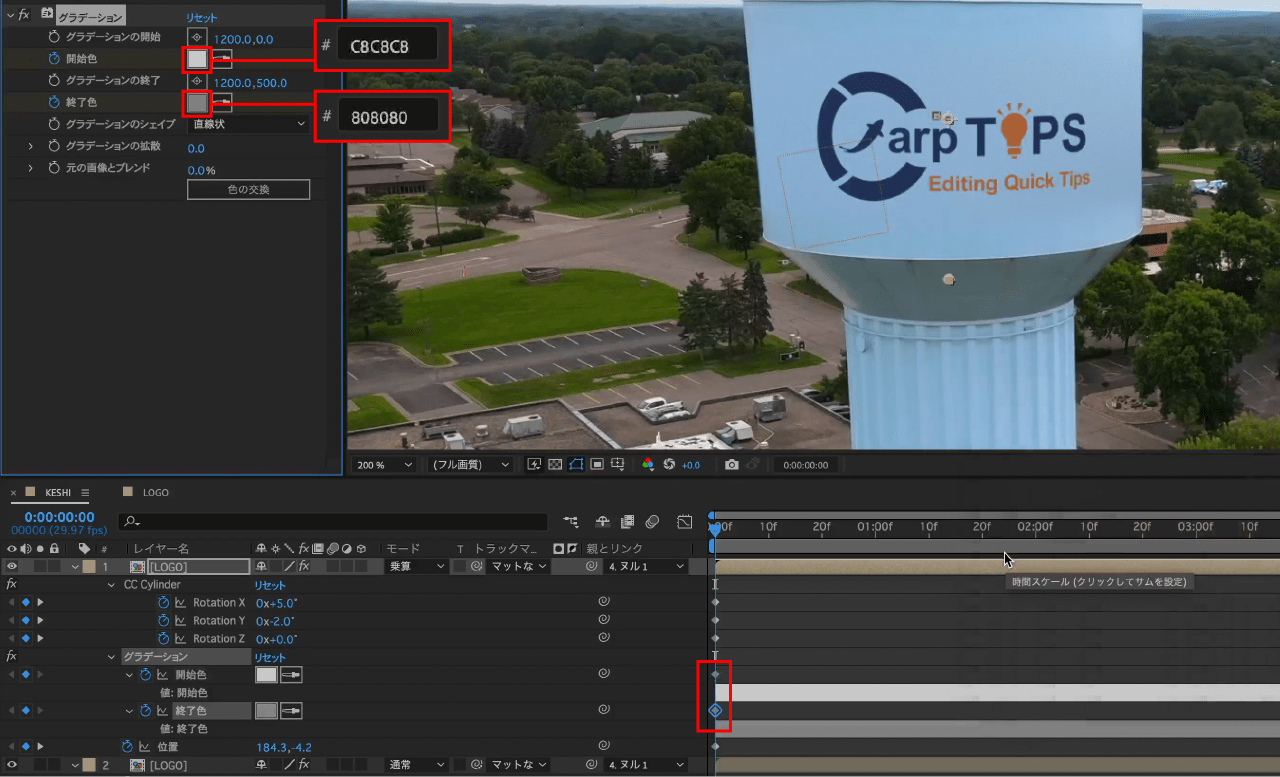
最初のフレームに戻り、【グラデーション】の【開始色】と【終了色】を看板の陰影に合うように調整してキーフレームを打ちます。
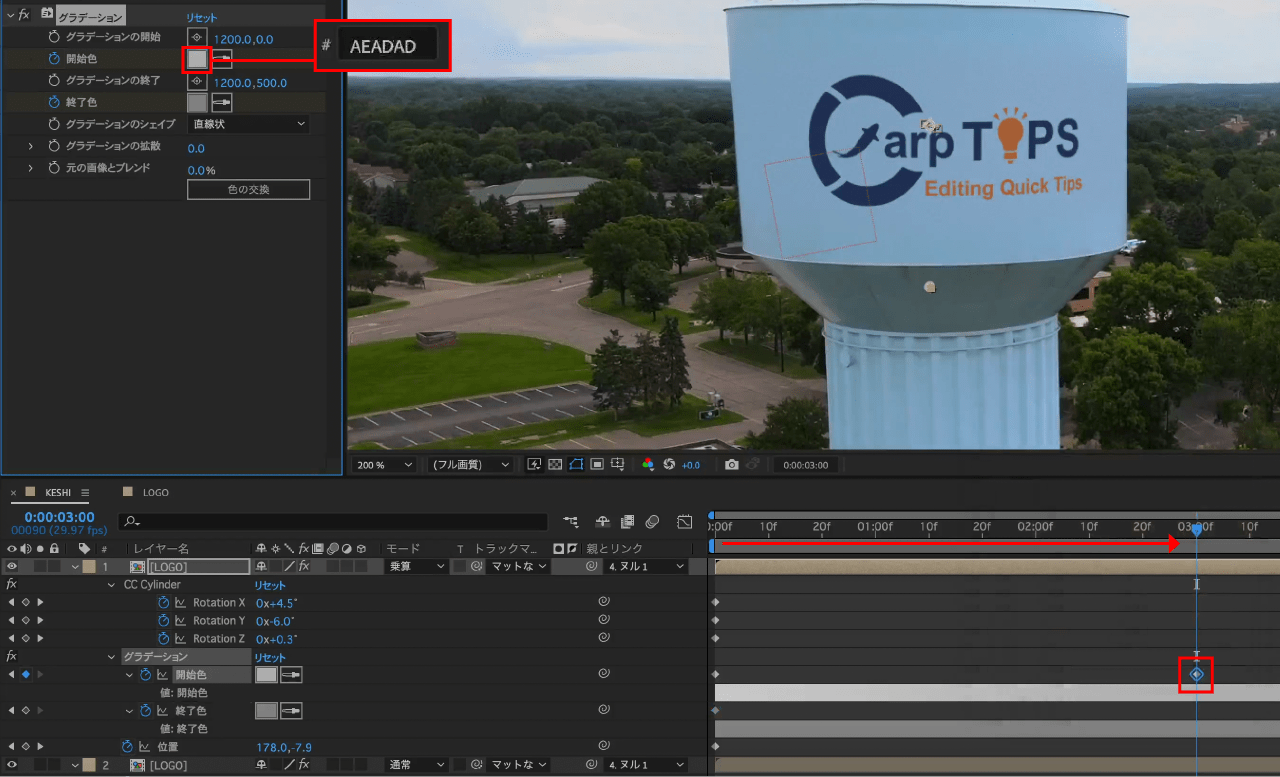
インジケーターを進め、変化のあったフレームにキーフレームを打ち調整を繰り返します。
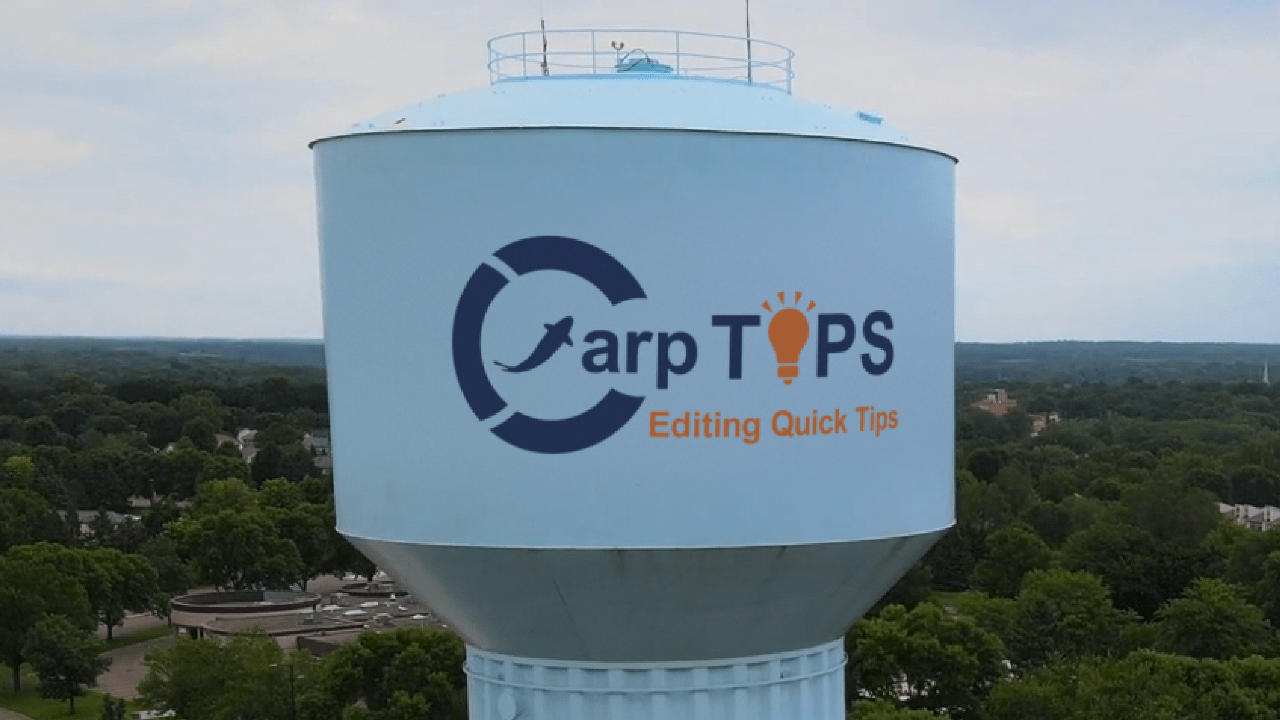
最終フレームまで調整できたら完了です。
これで看板の差し替えができました。
検証日:2024-8-20
環境:macOS Sonoma(14.4.1) / After Effects 2024(24.5.0)